
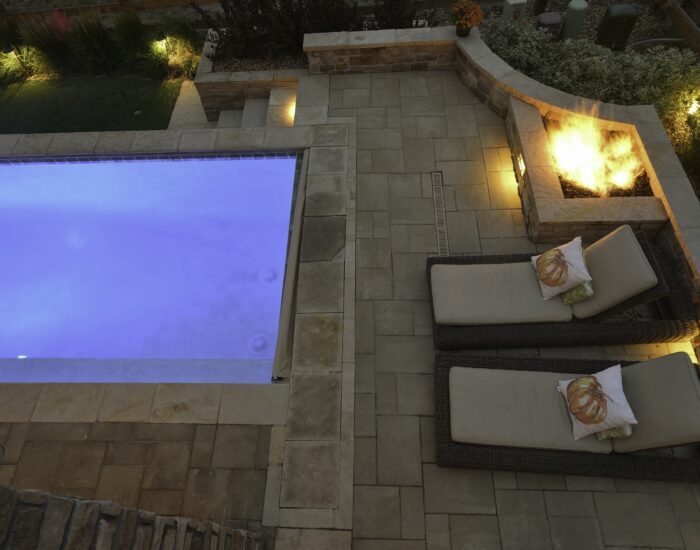
PhaseLogo

Our Gallery

Contact Info

Front Range, CO
Foothills, CO

Main: (303) 569-4248
Alternate: (303) 750-6060

email@phaseonelandscapes.com

Folow Us

September 18, 2026 by Admin 0 Comments

How to Add Privacy to Your Pool Area in Denver: Planting, Structures, and Smart Design

Denver pool & spa landscaping projects often reveal a frustration homeowners didn’t anticipate: you’ve invested in a pool, and now the space feels exposed to every neighbor and passing stranger. It’s a common outcome when privacy is treated as an afterthought rather than a design priority from the start.

Denver adds its own complications. Lot proximity in neighborhoods like Cherry Hills Village, Greenwood Village, and Highlands Ranch means second-story windows and raised decks frequently look directly into pool and spa areas. HOA fence height limits, Front Range wind exposure, and a semi-arid climate that punishes poorly selected plants all narrow the options. A fence alone doesn’t solve it. A few fast-growing shrubs don’t solve it either.

Solving the problem well means combining climate-adapted planting, engineered structures, and smart site layout into one unified plan, with each layer addressing what the others cannot. At Phase One Landscapes, we’ve been designing and building residential landscapes in the Denver Metro area since 1994, and pool privacy is one of the most consistent challenges we help homeowners work through. This guide covers how we approach it.

If you’re ready to move past research and explore what a professional privacy plan looks like for your site, schedule a consultation with the Phase One team.

Why Pool Privacy Is Harder Than It Looks

Denver neighborhoods create privacy challenges that catch homeowners off guard. Homes in Cherry Hills Village, Greenwood Village, and Highlands Ranch are often closer together than they appear on a map, and a neighbor’s second-story deck or upper bedroom window can have a direct view into your pool and spa from fifteen or twenty feet of elevation.

Strong Front Range winds add another layer of difficulty. A freestanding screen or lightweight trellis that looks right in a showroom won’t hold up to sustained western gusts without proper anchoring and engineering. Put one up without accounting for wind loads, and you’re replacing it within a season or two.

HOA rules in many Denver-area communities cap backyard fence heights at six feet. That’s enough to block a ground-level sightline, but it leaves your pool fully visible from any raised deck or second-story window nearby. A single tall fence is a starting point, not a privacy plan.
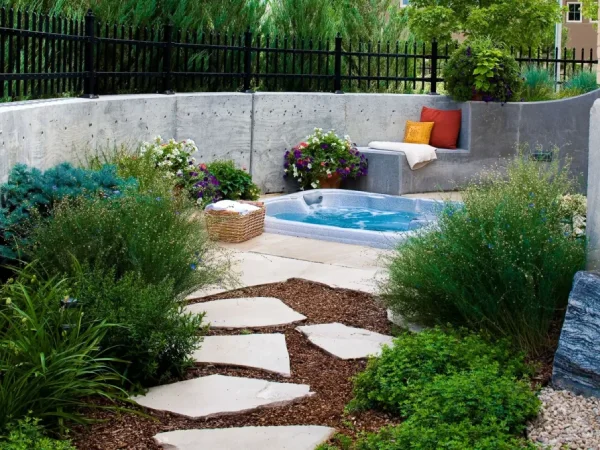
Start with Sightline Analysis, Not a Plant List

The first step in any pool privacy plan has nothing to do with selecting plants or choosing a pergola style. It’s about mapping what you need to block and from where. Our landscaping design/build expertise includes this analysis as part of every formal project engagement, because guessing where to place screening elements produces results that look arbitrary and underperform.

Here is how to approach the sightline analysis before your first consultation:

  • Stand at the pool deck: Look outward in every direction. Note every view corridor: neighbor fences, windows, raised structures, and street-facing openings.
  • Move to the lounge area: Repeat the exercise. Ground-level sightlines from a lounge chair are often different from those at pool edge, and the spa or hot tub is frequently more exposed than it appears.
  • Identify elevation-based sightlines: Mark every upper-story window within sight. Estimate the horizontal distance between that window and your pool deck. A window fifteen feet above grade and thirty feet away needs a different solution than one at the same height but fifty feet out.
  • Note what you want to keep: Mountain views and open sky are worth preserving. An effective privacy plan blocks the right things without turning your yard into a walled courtyard.
  • Document the wind direction: On Denver’s Front Range, prevailing winds tend to come from the west and northwest. A privacy structure that also buffers wind adds real comfort to the space.

This analysis determines plant heights, structure placement, and layout priorities. For backyard pool landscaping projects in Denver, skipping this step is the most common reason privacy solutions disappoint after installation.
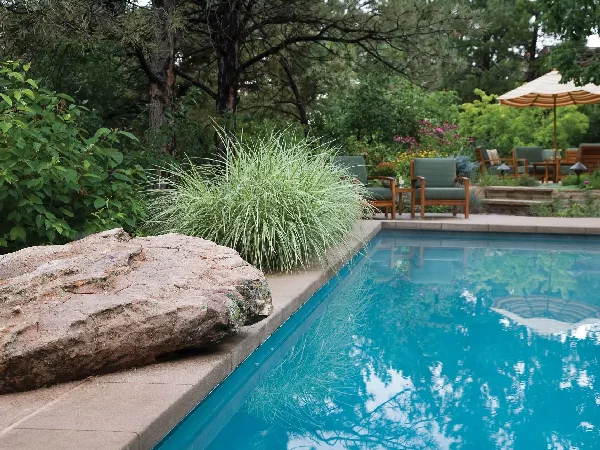
Layer One: Climate-Adapted Plants for Pool Area Screening

Plants are the most visually natural screening tool available, but in Denver’s semi-arid, high-altitude climate, plant selection isn’t a matter of picking whatever looks good at a nursery. Freeze-thaw cycles, intense UV, low annual precipitation, and strong wind exposure all influence whether a screening plant establishes well and performs over time. Our guide on designing for Denver’s microclimates covers these conditions in detail for homeowners who want to go deeper.

For pool screening, we think about plants in three functional categories:

  • Evergreen screening plants: For year-round coverage. Upright junipers and arborvitae varieties suited to Front Range conditions provide structure through winter when deciduous plants are bare. They grow slowly, so placing them correctly from day one matters.
  • Tall ornamental grasses: For warm-season screening and movement. Colorado-adapted species establish quickly and add a softness that evergreens alone can’t provide. They die back in winter, so they work best as a secondary layer behind evergreen structures.
  • Deciduous flowering shrubs: For seasonal layering and visual depth. Native options like serviceberry and native currants contribute to screening during the months you’re using the pool most, and they add seasonal color without demanding heavy irrigation.

Balancing Evergreens, Grasses, and Seasonal Plants

  • Evergreens: Give year-round privacy but take several growing seasons to reach effective screening height.
  • Ornamental grasses: Establish within one season but go dormant in winter, so they work best behind an evergreen layer.
  • Deciduous shrubs: fill in density during pool season when you need it most, then drop back to let the evergreen structure carry the space.
  • Pool microclimates matter: Splash, humidity, and reflected heat from pool coping all affect which plants thrive nearby. We factor placement around those conditions, not just general site exposure.
  • Warranty and establishment monitoring: All installed plant material is backed by a one-year warranty, and our irrigation team monitors new plantings for three to four weeks after installation.

Spacing and Placement: How Close Is Too Close to the Pool?

Two practical rules guide where plants go relative to the pool edge:

  • Keep larger shrubs and trees farther back: Root systems can interfere with pool plumbing and decking over time. Lower ornamental grasses and perennials work better in the near-pool layer.
  • Place deciduous plants downwind of the pool: Leaf drop directly upwind increases cleaning demands. Positioning deciduous plants where prevailing winds carry debris away from the water simplifies upkeep considerably.

Sightline analysis and wind patterns should drive placement decisions more than aesthetics alone.
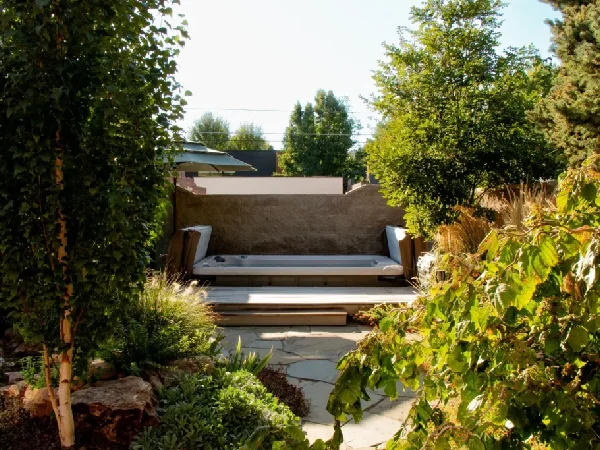
Layer Two: Structures That Create Privacy and Shade

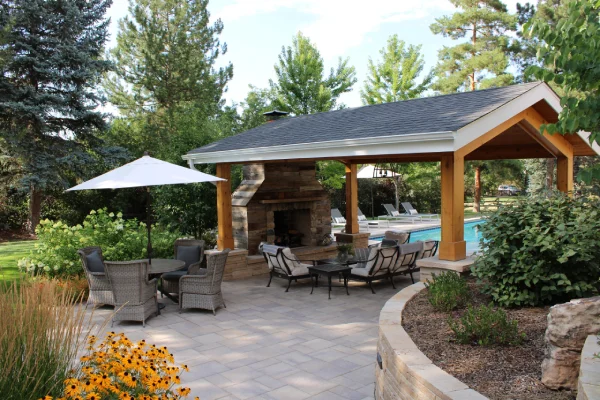
Plants solve many privacy problems, but structures solve the ones plants cannot: immediate privacy from day one, overhead coverage that blocks views from second-story windows, and wind protection that makes the space comfortable in spring and fall when Denver afternoons turn breezy.

The main structural options for pool-area outdoor living structures each address a specific problem:

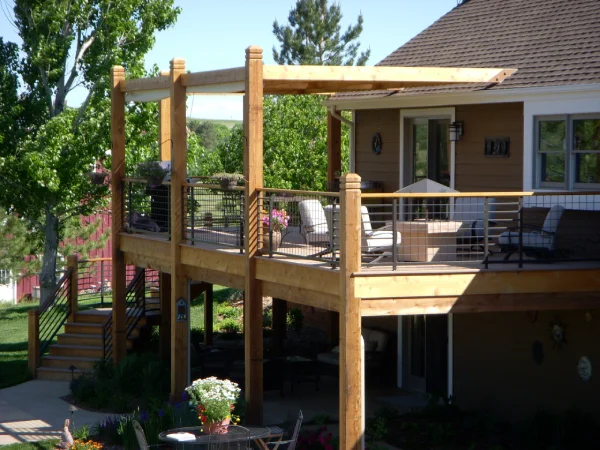
  • Pergolas with climbing plants or fabric panels: Provide overhead coverage for vertical sightlines while maintaining an open feel. They work especially well over spa areas where the exposure is often directly overhead.
  • Louvered pavilions: Allow adjustable overhead coverage so you control light, shade, and exposure based on time of day or season.
  • Privacy walls and masonry screens: Built into the pool deck create a permanent enclosure that appears considered as part of the landscape rather than a bolt-on fix. These are the strongest performers for both privacy and wind protection.
  • Slatted wood or metal screens: Provide partial screening without full enclosure. They work well for spots where you want to break a specific sightline without creating a walled feeling.
  • Code-compliant fencing: Within HOA and municipal limits forms the base perimeter. By itself, it rarely solves the privacy problem, but as the foundation layer for plants and structures above it, it’s the right starting point.

Every structure we build for Denver pool & spa landscaping projects is engineered for local wind loads and freeze-thaw conditions. A pergola footing adequate for milder climates can fail in a Denver winter. Materials that look fine on day one but aren’t rated for UV exposure and thermal expansion won’t look fine in year three. We back all hardscape elements with a two-year limited warranty, which reflects our confidence in how they’re specified and built.

HOA Rules and Setback Considerations in Denver Neighborhoods

Denver-area HOA and municipal rules vary significantly by community. Key constraints to know before you design:

  • Fence and structure height limits: Communities like Highlands Ranch, Greenwood Village, and Parker have HOA covenants capping fence heights and governing structure placement.
  • Mature plant height restrictions: Some HOAs limit plant height within designated buffer zones near property lines.
  • Municipal setback requirements: How close a wall or pergola, for example, can sit to a property line varies between Denver proper and surrounding municipalities.
  • Permit requirements: Structures above certain heights or with concrete footings typically require a building permit, and HOA approval may be required on top of that.

We treat permit research and HOA compliance as part of the design process. Bringing a privacy structure into compliance after it’s built is expensive and disruptive. Knowing the constraints before we design means the solution we propose is actually buildable on your specific lot.
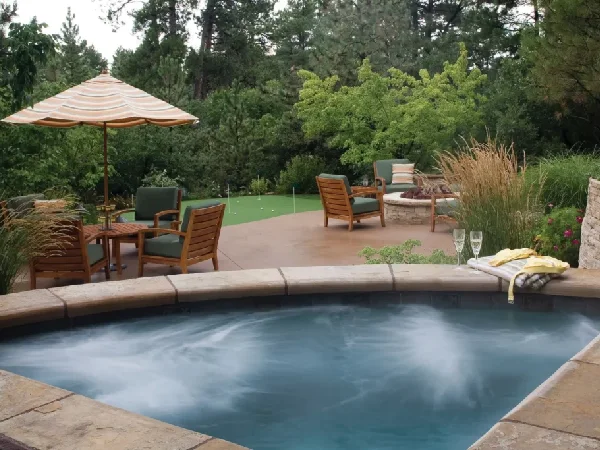
Layer Three: Smart Pool Patio Design and Layout

The least visible layer of pool privacy planning often has the biggest impact. How your pool deck, lounge areas, and spa are positioned relative to your property lines and neighbor sightlines determines how much screening work plants and structures have to do in the first place.

Key layout decisions that reduce privacy exposure without adding extra structures:

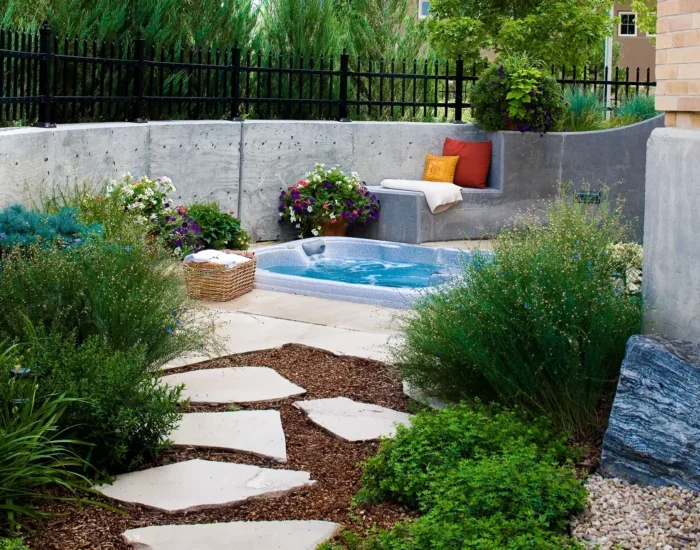
  • Position the spa or hot tub in a naturally sheltered corner: Rather than the most open area of the yard. Pool and spa landscaping projects in Denver frequently reveal that the spa was placed where it was easiest to plumb, not where it would feel most private. Moving it during planning costs nothing; moving it after installation is a significant expense.
  • Use grade changes and raised planting beds: Adds vertical screening without a fence. A planting bed raised eighteen inches creates meaningful ground-level privacy while adding visual interest.
  • Orient the primary seating area away from the most prominent neighbor sightline: Rotating your lounging zone even modestly can change which sightlines matter most for the space where you spend the most time.
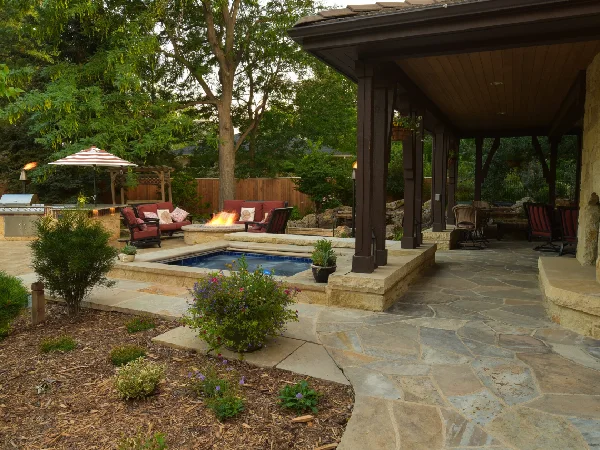
  • Use hardscape walls and planter walls as dual-function elements: A seat wall that also serves as a planter at the pool edge reduces the viewing angle from the neighbor’s yard while adding usable seating surfaces.

Pool patio design decisions made during the site-planning phase are comparatively easy to adjust on paper. After the pool shell is in the ground and the deck is poured, reworking the layout of the pool deck and surrounding hardscape is costly. Pool deck landscaping projects that start with a privacy-aware layout consistently need less remedial screening work later, and that’s the case for investing time in layout early, even when it means a longer design phase.
How a Design-Build Approach Protects Your Privacy Plan

A layered privacy plan only holds together when one team is responsible for designing and building all three layers. When design and construction are handled by separate firms, details get lost between them:

  • The specified evergreen screening species gets substituted at the nursery.
  • The pergola footing shifts six inches from where the designer placed it.
  • The privacy wall ends up shorter than the plan called for.

None of those changes gets reported back. You discover them when the project is done and the space doesn’t feel the way the design promised.

Our in-house design-build model keeps the same designer and project manager involved from the initial sightline analysis through the final walkthrough. The person who mapped your view corridors, selected your screening plants, and specified your pergola dimensions is also the person who oversees the construction crews. That’s what backyard pool design/build work in Denver should look like, and it’s rare among local landscape firms. Our landscape architecture design/build process is structured around this continuity from the first day of design through project close-out, and our work reflects that same no-handoff commitment.

Ready to talk through your pool privacy goals with a team that designs and builds Denver backyards from concept through completion? Request an appointment to schedule a site visit and sightline analysis.

What Phase One Homeowners Can Expect from the Process

Here is what the experience looks like from first contact through completion:

  • Initial consultation and site visit: We come to your property, walk the pool area with you, and conduct a preliminary sightline analysis. This is where we identify what needs to be blocked, what you want to preserve, and where the wind exposure is coming from.
  • Design development: Your assigned designer develops planting, structures, and layout as a unified plan. You review it, ask questions, and request changes. The designer handles those revisions, so nothing gets distorted through a hand-off.
  • Client review and refinement: We present budget analysis alongside the design so you understand what the plan costs before construction begins. Changes to scope are documented as change orders with clear explanations.
  • Construction by the in-house team: The same designer who developed your privacy plan oversees construction. Our crews execute the work; your designer confirms the result matches the intent.
  • Post-installation follow-through: Our irrigation team monitors new plantings for three to four weeks after installation. We schedule a 30-day satisfaction check-in, and your project is backed by a one-year plant warranty and a two-year limited hardscape warranty.

Phase One Landscapes has been delivering residential landscapes in Denver since 1994. About 60 percent of our new clients come through referrals, which reflects what our processes produce when they’re run the right way. See what our customers have to say.
Common Questions About Denver Pool and Spa Privacy

These are the questions we hear most often from homeowners when wanting to plan refinements to a pool or spa landscape in the Denver area.

How tall does a privacy screen need to be to block a second-story window?

It depends on the distance between the window and your pool. A window fifteen feet above grade and thirty feet away requires a taller or overhead solution than one at the same elevation but fifty feet out. A pergola or louvered overhead structure is often the most practical answer for steep vertical sightlines, because height alone in a planting or fence rarely solves the geometry.

What are the best evergreen plants for pool screening in Denver?

Upright junipers and arborvitae varieties suited to Front Range conditions are strong performers for year-round structure. Columnar forms work well in narrow planting strips near the pool. Plant selection must account for the pool microclimate, including splash and reflected heat, as well as any HOA rules governing mature plant height within setback zones.

Can I add privacy to an existing pool area without a full redesign?

Yes, in many cases targeted additions work well. A slatted screen, a pergola extension over the spa, or supplemental evergreen planting can address a specific sightline problem without touching the pool itself. If the pool’s layout creates fundamental exposure challenges, a more integrated approach will deliver better long-term value, but starting with targeted fixes is a reasonable first step.

What does pool privacy landscaping cost in Denver?

Scope varies widely depending on whether the project involves planting only, structures only, or a fully integrated plan combining both. Most first-time client projects at Phase One land in the $80,000 to $120,000 range for full residential landscape work, with privacy elements varying based on complexity and site conditions. A consultation is the right way to get an accurate number for your specific yard.

Do I need a permit for a pergola or privacy wall near my pool in Denver?

Often yes, depending on height, footing type, and whether the structure attaches to the house. Denver and surrounding municipalities have different thresholds, and HOA approvals may also be required. We handle permit research as part of the design-build process so the solution we propose is compliant before construction begins.

Ready to Plan Your Denver Pool Privacy Project?

Effective pool or spa area privacy in Denver comes together through three layers, each building on the last:

  • Sightline analysis: Maps exactly what needs to be blocked and from where before any plant or structure is specified.
  • Layered planting and engineered structures: All sized and positioned to address both ground-level and overhead sightlines.
  • Smart layout decisions: Made during the site-planning phase so the pool, spa, and lounge areas are positioned to minimize exposure from the start.

Getting all three right requires one accountable team that designs and builds the whole system from the same set of plans.

Phase One Landscapes has been serving the Front Range since 1994, with a Denver landscaping team that brings real depth to this work. The first conversation is about understanding the specific sightlines, conditions, and goals for your space. Reach out to schedule a consultation with Phase One, and let us design a privacy plan that transforms your pool area into the outdoor retreat you invested in.

For a broader look at how we approach a full pool and spa landscaping project, visit our pool & spa landscaping page. For related information, see our guide on designing a Denver backyard that works all year.
 

About Phase One Landscapes 

At Phase One Landscapes, we put your goals at the center of every design. With years of hands-on experience across Colorado, a passion for creativity, and a commitment to honest, friendly service, we’d be honored to guide your landscape transformation.

Ready to bring your dream yard to life? Contact us today for a consultation—let’s start the next chapter of your outdoor story together.

We can’t wait to hear your ideas—and turn them into reality!

Picture of Written by Dave Graham

Written by Dave Graham

Dave is a Denver native and co‑founder of Phase One Landscapes. After earning a B.S. in Landscape Architecture from Iowa State University in 1981, he worked as a laborer, construction foreman, and designer, learning residential design/build from the ground up. In 1988 he partnered with Dennis Frank to launch Phase One Landscapes, which has delivered hundreds of landscapes across Greater Denver. Dave prioritizes quality and service and remains involved with clients and teams. The firm’s projects have earned ALCC awards, appeared on ASLA Garden tours, and been published in national and local magazines.
View Dave Graham Profile

September 17, 2026 by Admin 0 Comments

Curb Appeal Lighting: Where to Place Path and Entry Lights for Safety and Warmth in Denver

Denver outdoor lighting placement determines whether your entry feels intentional or just illuminated. Most homeowners default to evenly spaced, symmetrical path lights that create an airport runway effect, or pick up solar stake lights that quit working reliably within a Colorado winter. This article, from the team at Phase One Landscapes, covers where to place path lights, entry lights, and step lights so your front approach works for both nighttime safety and the kind of warm curb appeal that carries from the street to the front door.

The Short Answer: What Good Path and Entry Lighting Actually Does

Effective path and entry lighting has two goals: it illuminates walking surfaces and grade changes for nighttime safety, and it creates a warm, welcoming appearance from the street. Placement matters more than fixture count. A well-positioned set of staggered path lights, flanking entry sconces, and targeted uplighting on a specimen tree will outperform twice as many fixtures placed without a plan.

Why Lighting Placement Matters More Than Fixture Selection

Where you place a light determines almost everything: whether the result appears considered or haphazard, whether guests see where they’re walking or squint into a glare source, whether your front entry feels layered and warm or over-lit and flat.

The most common mistake we see is buying fixtures first and placing them later. Homeowners purchase a set of matching path lights, space them at equal intervals down both sides of the walk, and end up with an effect that belongs at an airport, not a residential entry. The problem isn’t the fixtures. It’s the decision to treat placement as an afterthought.

When outdoor lighting is integrated as part of a full landscape design/build plan, fixtures work with the walkway materials, plant massing, and architectural features rather than against them. Our approach starts at the same point as everything else in a project: the hardscape layout and planting plan. That means fixture locations are mapped before conduit is run. In practice, that prevents three common problems:

  • A path light positioned where a mature shrub will block the beam within a few seasons
  • An entry uplight aimed at the wrong architectural feature because placement was decided in the final week of construction
  • Conduit routes that conflict with finished hardscape surfaces because lighting was added after the paver plan was set

That integration is what makes the difference between a lighting plan that holds up and one that looks like it was added on.

Where to Place Path Lights Along Denver Walkways and Driveways

Path lights along a front walkway or driveway edge should do one thing above everything else: illuminate the walking surface and the edges that define it. The light should wash across the path, not shoot upward from the fixture.

Staggered Placement for Visual Rhythm

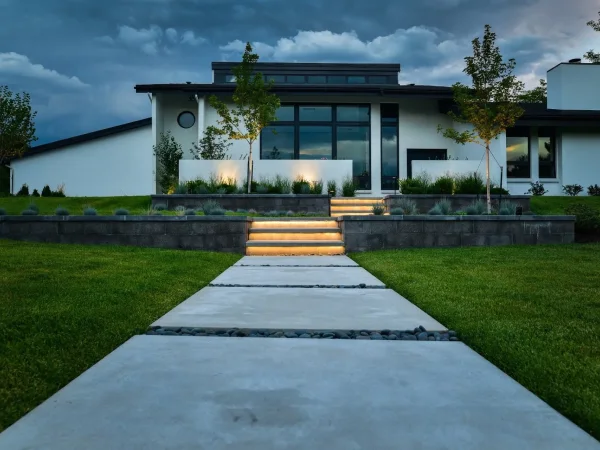
Stagger your path lights on alternating sides of the walk. Placing fixtures in parallel rows on both sides at identical intervals creates the runway effect described above. A staggered pattern, where each successive fixture sits on the opposite side from the last, creates a natural rhythm that guides movement without looking institutional.

Placement for Curved Paths and Driveways

For curved paths, position fixtures on the inside of the curve. That placement reinforces the direction of travel and keeps the beam pointed where a person’s foot will land next. At driveway edges, lights belong at the outer boundary, not the center, so the beam guides arriving vehicles and guests without shining directly into their eyes.

Spacing Considerations

Spacing is a function of the fixture’s output and beam spread, not a universal rule. A starting point of 8 to 10 feet between fixtures works for many residential walks, but a wider beam at higher output may allow greater spacing, while a narrow-beam fixture on a curved or grade-changing path may need to be tightened. At the transition from the driveway to the front walk, and again in the last stretch approaching the front door, closer spacing reinforces those directional changes. For more on how path materials inform fixture placement, see our resource on how to unify your driveway, walkways, and landscape borders.

Key Placement Rules for Path and Denver Driveway Lighting:

  • Stagger fixtures on alternating sides rather than running parallel rows down both edges, so the path has visual rhythm without the runway effect
  • Aim the beam across the walking surface, not upward from the housing, so the path is lit and the fixture itself isn’t the focal point
  • Tighten spacing at curves, grade changes, and approach transitions where directional cues matter most for safe footing
  • Position driveway lights at the outer edge, not the center, to guide arriving vehicles and guests without blinding them
  • Keep fixtures clear of areas where mature plants will grow tall enough to block the beam within a few seasons

How Many Path Lights Do You Actually Need?

More fixtures doesn’t produce a better result. Overlighting a path washes out the warm effect and introduces glare that actually makes it harder to see grade changes. The right number depends on walkway length, fixture lumen output, and how much ambient light already exists from your entry sconces or architectural lighting nearby.

A useful way to think about it: a well-designed path lighting plan uses the fewest fixtures needed to provide continuous visual guidance along the route, with no dark gaps and no pools of competing brightness. That calculation requires knowing what fixture you’re using and what the rest of the entry lighting looks like. It’s a design judgment, not a product-count decision, and a site visit is the most reliable way to resolve it.

Entry Light Placement: Flanking the Front Door and Framing the Approach

The front door zone is where path lighting and entry lighting meet, and getting it right means thinking about layers rather than individual fixtures.
A well-lit front entry uses three layers working together. Each one has a specific job:

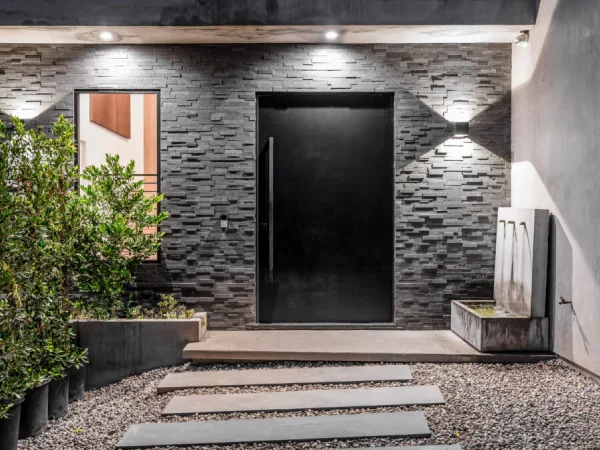
  • Flanking sconces: Mounted at roughly 66 to 72 inches above the finished floor on either side of the door, these provide the ambient light that makes the threshold usable at night and the front face of the home readable from the street. The goal is to frame the door without competing with architectural trim or casting shadows that make the lockset difficult to use.
  • Downlighting from a porch ceiling or soffit: A quieter source that fills in what flanking sconces leave in shadow, particularly on deeper porches or entries with an overhead structure, without adding a glare source at eye level.
  • Uplighting on one or two focal elements: A specimen tree, a prominent structural planting, or a key architectural feature lit from below creates the depth and visual interest that makes a front entry appear designed from the street. This isn’t about lighting everything. It’s about choosing what deserves attention and directing light at it specifically.

The result of combining these three layers, ambient light from sconces, accent from targeted uplights, and task light from path and step fixtures, is an entry that looks considered at night rather than simply lit. For a full picture of how these elements come together as part of a coordinated front entry project, our entry and curb appeal services page covers the broader scope.

Step Lights and Grade Changes: The Detail That Prevents Falls

Step lighting isn’t a finishing touch. In Denver, where grade changes are common, winter darkness arrives early, and ice accumulates on exterior steps from late October through early April, a properly lit step edge is a safety feature.

In-tread or in-riser step lights cast light downward onto the tread surface, illuminating the edge where a foot lands without projecting outward at eye level. That directionality matters: a light aimed into someone’s face as they approach a stair makes the step harder to read, not easier.

At-grade transitions, where a path meets a step, a landing, or a change in surface material, need a light source nearby to signal the change. These are the spots where someone who has walked the path dozens of times in daylight can still misjudge a distance in the dark. When ice has formed on the surface, the visual cue of that lit edge becomes especially important. Plan for step and transition lighting as non-negotiable components of any front entry where grade changes exist.

Denver-Specific Considerations for Outdoor Lighting Installation

Denver’s climate puts outdoor lighting systems under conditions that don’t apply in most of the country. Working in the Greater Denver Metro and Colorado Front Range for over 35 years, our team has seen how those conditions play out in real installations.

Three conditions in the Denver and Front Range climate directly affect how a lighting system is specified and installed:

  • Freeze-thaw cycles: As ground temperatures cycle through freezing and thawing across a Colorado winter, soil shifts. That movement can loosen fixture stakes, stress buried conduit joints, and work wiring connections loose over time. Fixture installation methods and conduit depth need to account for this from the start, not after a connection has failed mid-season.
  • High-altitude UV exposure: Denver’s elevation accelerates degradation of plastic fixture housings and lenses faster than at lower elevations. Fixture material and housing ratings aren’t a marketing detail here; they’re a durability specification. The Front Range gets intense sun even in winter, and a housing that holds up in other climates may not perform the same way here.
  • Extended winter darkness and snowmelt moisture: Fewer daylight hours from late fall through February mean your system runs longer and harder during the months when weather is also most challenging. Snow reflection amplifies glare from fixtures aimed too high or too far outward, so downward-aimed, shielded fixtures matter. Spring snowmelt creates ground-level wet conditions that require fixtures properly rated for that exposure.

These practical realities shape every decision our team makes in hardscaping installation work, from fixture specification to conduit routing.

Low-Voltage LED Systems: Why Professional Installation Outperforms Store-Bought Solar

Low-voltage LED systems use a transformer to step standard household current down to 12 volts. That’s the technical foundation of most professionally installed residential landscape lighting, and it matters for two reasons: it’s safe, and it’s consistent. Professional-grade LED fixtures hold their lumen output over time and through temperature extremes in a way that cheaper alternatives do not.

Limitations of Solar Stake Lights in Colorado

Solar stake lights from a home improvement store face a fundamental problem in Colorado. Shorter days from November through February limit the charging window. Snow cover on the panels interrupts charging further. The result is a system that provides the least reliable output during the months when you need it most. Solar lights also can’t integrate with the broader lighting control infrastructure of a property; they operate independently and inconsistently.

Advantages of Professional Low-Voltage Systems

A professionally installed low-voltage system includes a transformer sized to the actual electrical load of the installed fixtures, wiring that’s either buried to code depth or run in conduit, and fixtures specified for the conditions they’ll face. Our installed systems are part of the full project scope, coordinated by the same in-house team that handles the hardscape, planting, and irrigation, because the same team runs all of it. That coordination is what allows lighting conduit to be integrated into a paver field before the surface is finished, rather than cut in after the fact.

How Phase One Landscapes Integrates Outdoor Lighting Into the Full Design

Lighting placement is determined during the landscape design phase. By the time our Denver landscaping team is on-site, the fixture locations are already shown on the plan, coordinated with walkway joints, planting bed edges, tree placement, and architectural features. That sequence matters because it allows conduit runs to be integrated into the hardscape installation rather than retrofitted.

Continuity of Design and Construction

There’s no handoff between a landscape designer, a separate electrician, and a lighting vendor. The designer who draws the hardscape plan also determines where the lights go, and that person remains involved through construction. As Charles Kollmann states: “We’re with you the entire process because we’re a full in-house operation.” That continuity protects design intent and keeps decisions from falling through the gaps between trades.

Post-Installation and Warranty

After installation, we conduct a 30-day check-in as part of standard post-project follow-up, and our hardscape work is backed by a two-year limited warranty. Lighting installed as part of a larger landscape project is part of that broader scope. Over three decades of work in the Greater Denver Metro, our team has earned more than 20 to 30 awards from the Associated Landscape Contractors of Colorado. This kind of institutional knowledge shows up in the details of how a system is specified and installed. Learn more about us and our credentialing, and see the full scope of our landscape construction services including how landscape lighting fits within a complete project.
Ready to talk through your entry lighting plan? We’re happy to walk through your property and think about it with you. Start a conversation with our team.

Common Lighting Placement Mistakes and How to Avoid Them

These are the patterns we see most often when a lighting plan hasn’t been thought through from the design stage.

The Runway Effect

The runway effect comes from placing fixtures in parallel rows at equal spacing on both sides of a walk. The fix is straightforward: stagger the fixtures and adjust spacing at grade changes and transitions rather than holding a fixed interval throughout.

Over-Uplighting

Uplighting is most effective when it’s reserved for specimen trees, strong structural plantings, or architectural elements that genuinely deserve attention. When every shrub in a planting bed receives the same uplight at the same intensity, nothing stands out and the overall result appears as noise rather than design.

Unlit Step Transitions

An unlit step transition is both a safety gap and a visual gap. Any change in surface level or material belongs on the lighting plan. Leaving those transitions in shadow is the detail that most often undermines an otherwise solid installation.

Color Temperature Considerations

Color temperature has a meaningful effect on how a front entry feels from the street. Warm white in the 2700K to 3000K range appears welcoming against Colorado stone, wood, and plant material. Cooler color temperatures tend to look clinical in residential settings, and Denver’s zoning code establishes a maximum color temperature for applicable outdoor lighting situations, so working within that range is both a sound design choice and a code consideration worth confirming with your design-build team.

Ignoring Mature Plant Sizes

Installing fixtures before planting is finalized creates a problem that reveals itself slowly. A light positioned to uplight a young ornamental grass may be blocked entirely by a mature neighboring shrub in three or four seasons. Good landscape lighting design accounts for mature plant sizes from the start, and that requires working from the full landscape plan rather than deciding fixture locations independently. This is where thoughtful landscape lighting design, grounded in the complete picture of the site, consistently outperforms a fixture-first approach.

Frequently Asked Questions About Path and Entry Lighting in Denver

How far apart should path lights be spaced?

A starting point of 8 to 10 feet between fixtures works for many residential walkways, but the right spacing depends on fixture lumen output, beam spread, path width, and nearby ambient light sources. Tighten spacing to 5 to 6 feet at curves, grade changes, and in the final stretch approaching the front door. Staggered placement on alternating sides is more effective than parallel rows regardless of the spacing used.

What color temperature works best for outdoor landscape lighting in Denver?

Warm white in the 2700K to 3000K range works well in most residential settings. It appears welcoming against natural stone, wood, and plant material, and it avoids the clinical look that cooler color temperatures create next to a home. Denver’s zoning code establishes a maximum color temperature for applicable outdoor lighting installations, and working within the 2700K to 3000K range keeps your project on the right side of that requirement.

Do I need a permit for low-voltage landscape lighting in Denver?

Low-voltage systems operating at 12 volts typically don’t trigger an electrical permit requirement in most Colorado jurisdictions, but line-voltage landscape lighting does. Requirements can vary by project scope and municipality. Your design-build team should confirm the specific permit status for your project before installation begins, since the answer depends on what is being installed and where.

How do I keep path lights working through Colorado winters?

Professional-grade fixtures rated for outdoor use, with properly buried or conduit-run wiring, maintain consistent performance through freeze-thaw cycles. Solar stake lights aren’t a reliable solution in Colorado’s climate: shorter winter days and snow cover on panels limit charging during exactly the months when the lights are needed most. A professionally installed low-voltage LED system with a properly sized transformer is the dependable alternative.

Can landscape lighting be added to an existing hardscape?

Yes, it can be retrofitted, though it’s more cost-effective and cleaner when planned during the original hardscape installation. When conduit and wiring are integrated before a paver field or concrete surface is poured and finished, you avoid cutting into completed work later. If your hardscape is already in place, a site assessment will help determine the best approach for adding lighting without compromising the finished surfaces.

Practical Takeaways: A Simple Placement Checklist for Front Entry Lighting

  • Stagger path lights on alternating sides of the walkway rather than placing them in parallel rows.
  • Illuminate every step edge and at-grade surface transition, including spots where path material changes.
  • Layer entry sconces with targeted uplighting on at least one specimen tree or architectural feature near the door.
  • Stay in the 2700K to 3000K color temperature range for a warm, welcoming result that also respects Denver’s outdoor lighting guidelines.
  • Size the transformer to the full electrical load of the installed system, not just the initial fixture count.
  • Map fixture locations relative to mature plant sizes, not just current installation-day conditions.
  • Choose fixtures rated for outdoor moisture exposure and temperature extremes appropriate to Colorado’s climate.
  • Confirm conduit routing before hardscape surfaces are poured or set, so wiring can be integrated cleanly.

Lighting Is Part of the Landscape, Not a Product Category

Thoughtful path and entry lighting does two things at once: it makes the home safer to handle at night and it creates a first impression that carries from the street to the front door. The difference between a lighting plan that achieves both and one that misses is almost entirely in the placement and integration decisions made during design, before a single fixture stake goes in the ground.

We’ve been planning and building landscape lighting as part of full residential designs across the Greater Denver Metro and Colorado Front Range since 1994. It’s one piece of a complete landscape, and it works best when it’s treated that way from the start. If you’re thinking about a front entry project that includes a new walkway, steps, or planting, our resource on designing a custom flagstone entry, and our service page on entry & curb appeal are good places to see how these elements connect.

If you’re ready to explore how outdoor lighting can work as part of your landscape design, schedule a design consultation with us. You can also browse our project portfolio to see finished lighting work on real Front Range homes.


About Phase One Landscapes 

At Phase One Landscapes, we put your goals at the center of every design. With years of hands-on experience across Colorado, a passion for creativity, and a commitment to honest, friendly service, we’d be honored to guide your landscape transformation.

Ready to bring your dream yard to life? Contact us today for a consultation—let’s start the next chapter of your outdoor story together.

We can’t wait to hear your ideas—and turn them into reality!

Picture of Written by Dave Graham

Written by Dave Graham

Dave is a Denver native and co‑founder of Phase One Landscapes. After earning a B.S. in Landscape Architecture from Iowa State University in 1981, he worked as a laborer, construction foreman, and designer, learning residential design/build from the ground up. In 1988 he partnered with Dennis Frank to launch Phase One Landscapes, which has delivered hundreds of landscapes across Greater Denver. Dave prioritizes quality and service and remains involved with clients and teams. The firm’s projects have earned ALCC awards, appeared on ASLA Garden tours, and been published in national and local magazines.
View Dave Graham Profile

September 17, 2026 by Admin 0 Comments

What a High-End Front Entry and Curb Appeal Upgrade Includes in Metro Denver

Getting a quote for a Denver entry and curb appeal landscaping project and having no idea what it actually covers is one of the most common frustrations we hear from homeowners at Phase One Landscapes. The number lands and there’s no frame of reference: no list, no scope breakdown, no sense of what the work actually involves. This article is our attempt to fix that, drawing on more than 30 years of design-build work across the Denver Metro area, so you understand what a quality front entry upgrade includes before you call anyone.

The Short Answer: Here Is What a Complete Front Entry Upgrade Includes

A high-end front entry upgrade in Denver typically includes a flagstone or paver walkway, steps and landings, retaining or seat walls, a driveway connection, drainage corrections, planting design, rock landscaping elements, landscape borders, and lighting, all coordinated by one design-build team from site survey through final installation.

To see the full range of work we do at the front of the home, visit our entry and curb appeal services page.

What We Design and Build

A complete front entry upgrade draws on a consistent set of components that work together as one coordinated system. Here is what that typically includes:

  • A flagstone or paver walkway: For a properly proportioned, durable approach from street to door
  • Steps and landings: Sized and detailed to feel generous, safe, and visually connected to the walkway
  • Retaining walls: To manage grade changes and hold soil on sloped lots
  • Seat walls: To define space, add usable seating, and provide visual framing for the entry
  • A driveway connection and apron transition: Pulls the full arrival sequence together
  • Drainage corrections and subsurface base preparation: To protect against freeze-thaw failure
  • Planting design: With climate-adapted species that soften edges and add seasonal color
  • Rock landscaping elements: Including boulders, crushed stone, and decomposed granite for structure and water efficiency
  • Landscape borders: To create clean, finished edges between planting beds and hardscape
  • Outdoor lighting: Integrated during construction for path safety, step visibility, and evening curb appeal

Why a Front Entry Upgrade Is a System, Not a Shopping List

The most common mistake we see in front entry work is treating each element as a separate purchase: ordering a new walkway one year, adding steps two years later, planting something in between, and ending up with components that don’t quite connect visually or structurally. The result is a front yard that looks assembled over time rather than designed from the start.

A well-executed entry is an arrival sequence. Every material, grade change, planting edge, and light placement is decided together because they affect each other. The sequence works like this:

  1. The width of the walk determines how the landing reads
  2. The landing size determines whether steps feel generous or cramped
  3. The steps inform where seat walls make sense
  4. The walls and edges inform where planting and lighting belong

Getting these decisions right requires a single coordinated design from the first drawing.

Our landscape design-build process is structured this way from the start. The same designer who draws the plan manages the project through construction, so nothing gets lost in translation between the design phase and the build.

The Core Components of a Denver Hardscape Services Project at the Front Entry

Every project we build is fully custom, but most complete front entry upgrades in the Denver area share a consistent set of elements. Understanding what each one involves, and why it matters, helps you evaluate any scope of work before signing a contract. Our hardscape services start with all of these in view.

Walkways and Entry Paths

The walkway is the primary visual line from the street or driveway to your front door, and it sets the tone for everything else on the property. Width matters more than most homeowners expect: a walk that’s too narrow reads as an afterthought, while a properly proportioned entry path, typically in the range of five to six feet, signals that the approach was designed rather than defaulted. Material choices include flagstone, concrete pavers, and natural cut stone, each with distinct performance and aesthetic characteristics in Denver’s climate.

Base preparation is where quality entry paths are won or lost in Colorado. Our team specifies compacted aggregate base material and edge restraint systems that account for freeze-thaw movement, so the surface holds its alignment over time rather than heaving or separating. For a closer look at flagstone specifically, see our guide to designing a custom flagstone entry.

Steps, Landings, and Grade Changes

Grade changes are present on the majority of Denver-area residential lots, and steps are almost never just functional: they’re an aesthetic opportunity that most homeowners underestimate. Riser-to-tread ratios determine whether steps feel comfortable and safe to use; proportions that work indoors don’t always translate well to exterior construction where users are moving faster and carrying things.

Landing sizing is equally important. A landing that’s too shallow forces you to step up and immediately open a door, which is awkward and can create a safety issue. Material consistency between the steps and the walkway surface keeps the entry reading as one composition rather than a series of disconnected moves. Freeze-thaw conditions make base preparation for steps especially demanding, since improperly set steps are one of the most frequent failure points we see in low-bid entry work.

Retaining Walls and Seat Walls

There’s a meaningful difference between a structural retaining wall and a decorative seat wall, and both appear regularly in Denver front entry designs. A retaining wall holds back soil and manages grade; on sloped lots in areas like Highlands Ranch, Parker, and Cherry Hills Village, these walls are often necessary before a walkway can even be built. A seat wall defines space, adds usable seating, and provides visual framing for the entry.

Material options for both include segmental retaining wall block, natural stone, and flagstone cap details. Segmental block offers precise engineering tolerances and comes in a wide range of textures and colors. Natural stone reads as higher-end and integrates well with existing architecture. One practical note: in some Denver Metro jurisdictions, retaining walls above a certain height require a permit and engineering review, which is part of the scope assessment we complete early in the design process. Denver hardscaping construction that involves walls near property lines or public right-of-way carries specific regulatory considerations.

Driveway Connection and Apron Work

A new walkway that meets an unchanged driveway apron rarely reads as finished. In a cohesive entry design, the transition from driveway to front walk is part of the composition: a paver border or inlay added to an existing concrete driveway, a resurfaced apron, or a redesigned edge transition can pull the whole arrival sequence together visually.

Driveway connection work also carries permitting considerations when it approaches or involves the public right-of-way, which is common in Denver neighborhoods where the apron extends to the curb cut. We handle that coordination as part of the project scope. For more on how we approach this, see our resource on how to unify your driveway, walkways, and landscape borders.

Drainage Corrections and Subsurface Prep

Drainage is the least visible part of a front entry project and the most consequential. Improper drainage is the leading cause of premature hardscape failure in Colorado: water that pools against a foundation, runs underneath a paver field, or saturates a base layer during a freeze-thaw cycle will eventually move things. No amount of quality surface material compensates for a base that isn’t moving water away correctly.

Proper base preparation involves compacted gravel base depth sized to site conditions, slope-away-from-foundation grading, and edge restraint systems that prevent lateral spreading. The honest reality is that not all drainage issues are visible during a visual site walk. Some only become clear once excavation begins, which means change orders arising from drainage discoveries are a normal part of this work. We communicate those situations clearly, document them fairly, and in some cases absorb costs when that’s the right thing to do.

Planting Design and Rock Landscaping

Plant material and rock landscaping elements are what make a hardscape design feel like a finished landscape rather than a construction project. Strategic plant placement softens the edges of walls and walkways, adds seasonal color, and creates visual layers that change throughout the year. In Denver’s high-altitude, semi-arid climate, plant selection isn’t just an aesthetic decision: species that aren’t climate-adapted often fail within a few seasons, which wastes your investment and leaves gaps in the design.

Rock landscaping in Denver, including boulders, crushed stone, and decomposed granite, provides visual structure while supporting water-efficient design. These elements are particularly effective for areas that get intense sun exposure or foot-traffic wear. We carry a one-year warranty on plant material and our irrigation team monitors establishment for three to four weeks after installation. Landscape borders, the clean edges that define where planting beds meet hardscape, are a finishing detail that separates a designed entry from one that grew organically over time.

Outdoor Lighting

Lighting isn’t an afterthought in a quality entry design, and adding it after construction is complete costs more and requires more disruption than running conduit during the original hardscape installation. Path lighting improves safety and navigation along the walk. Uplighting on specimen trees or architectural features extends the visual impact of the entry into the evening hours. Step lighting integrated into risers or wall faces handles both safety and aesthetics simultaneously. A well-lit entry functions year-round, which matters in Denver where evenings arrive early for a significant portion of the year.

Material Selection for Denver’s Climate: What Holds Up and What Doesn’t

Material selection for a flagstone entry in Denver or any front hardscape project is a structural decision before it’s an aesthetic one. Denver’s freeze-thaw conditions are demanding: water that infiltrates a porous material or an inadequate base, then freezes and expands, can fracture surfaces or heave entire sections within a few winters.

Flagstone is a natural, irregular material with a high-end appearance that performs well in Colorado when set correctly. It requires either a proper mortar bed or a compacted dry-set base; cut corners on either and the result eventually reflects it. Concrete pavers are manufactured to precise tolerances, offer excellent freeze-thaw performance when installed over a proper base, and come in a wide range of styles and finishes. Pavers services in Denver frequently favor concrete units because individual pavers can be reset if a section shifts, rather than requiring full slab replacement.

Natural cut stone or dimensional stone represents the highest material cost among the three primary categories and is typically reserved for custom or estate-level entry work. It delivers a premium appearance that reads as genuinely distinctive rather than production-grade. For a side-by-side breakdown of how these materials compare in installation, cost, and longevity, visit our resource on pavers vs. concrete vs. natural stone in Denver.

What to Expect from the Design-Build Process at Phase One Landscapes

Every project starts with an in-person site assessment. We look at:

  • Grades and drainage patterns across the full site
  • Existing hardscape conditions and what’s worth keeping
  • Utility locations and buried irrigation lines
  • HOA requirements if applicable
  • How the existing architecture informs material choices

That first visit is where we ask the questions other contractors sometimes skip: where does the water go when it rains hard? What’s the height differential from the street to the front door? How does this entry need to function in December?

From there, our in-house designers develop a conceptual plan and material specification. You’re working with one person from that first conversation through the day we walk the finished project, which is the core of how our turnkey, design-build model works. There are no handoffs from a design firm to a separate builder. When the designer who drew your plan is also managing your construction crew, details don’t fall through the gaps.

The Denver landscaping team behind your project:

  • Nine field crews operating across the Denver Metro area
  • Five to six in-house designers who serve as project managers throughout construction
  • A construction manager with over 31 years at Phase One Landscapes
  • Senior designers with over 20 years of tenure
  • More than 20 awards from the Association of Landscape Contractors of Colorado
  • A two-year limited hardscape warranty and one-year plant material warranty
  • A 30-day post-project satisfaction check-in

That institutional knowledge benefits your project in direct ways: we’ve seen what fails in Colorado winters and what holds up. Learn more about who we are.

Ready to see what this looks like for your home? Schedule a consultation today, or call (303) 750-6060.

Understanding Investment Ranges for Denver Hardscaping Construction

We’d rather have a direct conversation about cost than leave you guessing. Our minimum project size is typically around $20,000, and a complete first-time project typically falls in the $80,000 to $120,000 range. For larger lots or estate-level scope, projects scale well beyond that.

The main factors that drive cost in a front entry project:

  • Site conditions and soil type across the Front Range vary widely
  • Grade complexity and how much retaining or regrading the lot requires
  • Material selection, from concrete pavers to natural cut stone
  • The scope of drainage corrections needed before hardscape can begin
  • Total number of elements included (walkway only vs. full entry system)

A project on a flat lot with minimal drainage corrections and a concrete paver walkway looks different on paper than a sloped lot in Cherry Hills Village requiring structural retaining walls, natural stone, and a full drainage redesign. Both are possible; the scope just needs to match the site.

Our pricing reflects fair market value for work done correctly the first time, using materials and methods that hold up through Colorado winters. We’re not the least expensive option available, and we don’t try to be. Lower bids in for Denver hardscaping construction projects frequently exclude base prep depth, drainage corrections, or lighting conduit, and those omissions show up as failure two to four winters in.

Construction Realities and How We Handle the Unexpected

Outdoor Denver landscape construction involves subsurface conditions that can’t always be determined from a visual site walk. Soil conditions vary considerably across the Front Range: expansive clay soils common in Highlands Ranch behave very differently from the rockier, more stable conditions you encounter in Parker and Castle Rock. Both create their own challenges once excavation begins.

Common surprises we encounter once excavation begins:

  • Expansive clay soils in areas like Highlands Ranch that shift under load
  • Rocky or unstable substrate in Parker and Castle Rock that complicates base prep
  • Buried irrigation lines not shown on any plan
  • Grade drops that only become visible after grading starts

When something unexpected comes up, we call you, explain what we found, and walk through the options before anything changes. Change orders are documented, fair, and handled the same way every time. We ask what’s fair, what’s right, and what’s just, and sometimes that means absorbing costs when it’s the right thing to do. That approach isn’t something we developed for marketing purposes; it’s reflected in the fact that roughly 60% of our new work comes from referrals.

Frequently Asked Questions About Front Entry Upgrades and Denver Hardscape Services

How long does a front entry hardscape project take in Denver?

Timeline depends on project scope, site conditions, and where your project falls in our construction schedule. Once a construction agreement is signed, our target is to break ground within approximately one to two months. Smaller entry projects focused on a walkway and steps may complete within a week or two of breaking ground; larger projects involving retaining walls, drainage work, and full planting design take longer. We’ll give you a realistic timeline during the design phase, not an optimistic one.

Do I need a permit for a front entry upgrade in Denver?

Some entry work requires permits and some doesn’t, depending on scope and location. Work near the public right-of-way, such as driveway apron modifications or sidewalk connections, often requires city review. Structural retaining walls above certain heights typically require a permit and engineering in Denver Metro jurisdictions. We handle permitting coordination as part of the project and will tell you early in the process what’s required for your specific site.

What is the difference between a flagstone entry and a paver entry?

A flagstone front entry uses natural, irregular stone pieces set in a mortar bed or compacted dry-set base, giving it an organic, high-end appearance that varies from project to project. A paver entry uses manufactured concrete units cut to precise dimensions, which allows for more consistent patterns and easier future repairs if a section shifts or settles. Both perform well in Denver’s climate when installed correctly. The right choice depends on your architecture, budget, and aesthetic preference. Curb appeal upgrades Denver homeowners pursue at the higher end of the investment range often combine both materials.

How do I know if my entry project includes drainage work?

Drainage is assessed during the initial site visit. We look at where water currently flows, whether it’s pooling near the foundation or running across the walk, and what the grade tells us about where it needs to go. Many front entry projects in the Denver area require at least some drainage correction, and we include that scope in the design rather than treating it as an add-on. Denver entry and curb appeal work that skips drainage assessment tends to result in hardscape problems within the first few winters.

Does Phase One Landscapes offer a warranty on hardscape work?

Yes. We back hardscape installations with a two-year limited warranty and plant material with a one-year warranty. Beyond the warranty period, we conduct a 30-day satisfaction check-in after project completion, and our irrigation team monitors new plant establishment for three to four weeks post-installation. If something isn’t right, we come back. That follow-through is a core part of how we operate, not an exception we make under pressure.

Have more questions? Browse our completed projects or schedule a consultation.

The Bottom Line on High-End Entry Upgrades in Metro Denver

A premium front entry upgrade is a coordinated system: hardscape, drainage, planting, and lighting designed together for Denver’s climate and built by one team that stays with the project from first drawing to final walkthrough. When those elements are planned separately or installed by different contractors at different times, the result rarely holds up or reads as intentional.

Phase One Landscapes has delivered this kind of work across the Denver Metro area since 1994. Our in-house team, backed by more than 30 years of local design-build experience and a construction manager with over three decades of tenure here, handles every phase of the project under one roof. The two-year limited hardscape warranty and 30-day post-project check-in mean our accountability doesn’t end at the last invoice. If you’re also thinking about backyard work in the same project cycle, our patio and deck construction services are worth reviewing alongside front entry work.

For more on our full range of Denver landscape construction capabilities, visit our construction services page. To start a conversation about your project, call us at (303) 750-6060 or schedule a consultation.


About Phase One Landscapes 

At Phase One Landscapes, we put your goals at the center of every design. With years of hands-on experience across Colorado, a passion for creativity, and a commitment to honest, friendly service, we’d be honored to guide your landscape transformation.

Ready to bring your dream yard to life? Contact us today for a consultation—let’s start the next chapter of your outdoor story together.

We can’t wait to hear your ideas—and turn them into reality!

Picture of Written by Dave Graham

Written by Dave Graham

Dave is a Denver native and co‑founder of Phase One Landscapes. After earning a B.S. in Landscape Architecture from Iowa State University in 1981, he worked as a laborer, construction foreman, and designer, learning residential design/build from the ground up. In 1988 he partnered with Dennis Frank to launch Phase One Landscapes, which has delivered hundreds of landscapes across Greater Denver. Dave prioritizes quality and service and remains involved with clients and teams. The firm’s projects have earned ALCC awards, appeared on ASLA Garden tours, and been published in national and local magazines.
View Dave Graham Profile

September 2, 2026 by Admin 0 Comments

Phase One Landscapes Launches Updated Denver Pool and Spa Landscaping Page

Backed by more than 35 years of Front Range experience, this resource helps Denver homeowners plan and build complete pool and spa environments with clarity, confidence, and one accountable team.

DENVER, Colorado, September 2, 2026 — Phase One Landscapes has revamped its pool and spa landscaping service page to provide Denver homeowners with a comprehensive resource for planning, designing, and building complete pool and spa outdoor environments. The update goes well beyond a standard service description, offering detailed guidance on Denver’s climate-specific design challenges, material selection, the full design-build process, and the post-project care program that protects client investments after construction is complete.

“A pool or spa is the most significant investment a Denver homeowner can make in their outdoor space, but the pool itself isn’t the finished product,” said Charles Kollmann, Senior Leader at Phase One Landscapes. “The finished product is the entire environment around it. Our goal with this page is to help homeowners understand what a truly integrated pool landscape looks like, how the process works, and why having one accountable team manage all of it from design through build and beyond makes a real difference in the outcome.”

Phase One Landscapes serves homeowners throughout the Greater Denver Metro area and the Colorado Front Range, delivering fully custom outdoor living environments tailored to each property, lifestyle, and site condition. The company has earned more than 20 awards from the Association of Landscape Contractors of Colorado over the past two to three decades and maintains active membership in both the ALCC and the American Society of Landscape Architects.

The updated page addresses the full range of what a complete pool and spa environment involves, including:

  • Pool deck and patio design using materials specified for Colorado’s freeze-thaw conditions and high UV exposure
  • Climate-adapted, low-debris plant selection suited to Denver’s semi-arid, high-altitude environment
  • Shade structures, pergolas, and covered outdoor living spaces that extend seasonal usability
  • Outdoor kitchens, fire features, and lighting designed as integrated elements of the outdoor room
  • Hot tub and spa integrations designed as dedicated retreat environments
  • Irrigation systems zoned for water efficiency and plant establishment in Colorado’s climate
  • Privacy screening solutions using both planting and structural design

The page also walks visitors through Phase One’s end-to-end design-build process, from initial consultation and 3D design development through permitting, construction, and post-build stewardship. Homeowners will find honest guidance on what pool and spa landscaping realistically costs in Denver’s current market, how change orders are handled, and what the post-build care program includes, covering a 30-day satisfaction check-in, three to four weeks of irrigation monitoring post-installation, a one-year plant warranty, and a two-year limited hardscape warranty.

A key emphasis of the updated page is Phase One’s design-build continuity model, in which the same in-house designer and project manager stays with the client from the first design conversation through construction and close-out. Unlike pool installation companies that treat the surrounding landscape as a separate scope, or design-only firms that hand clients off to a builder after the drawings are complete, Phase One manages every element of the outdoor environment under one roof, coordinating all subcontractors and protecting the original design intent through every phase of the project.

The page also features an expanded project gallery showcasing pool and spa environments delivered across the Denver metro and Front Range, giving homeowners a concrete sense of the range of outcomes Phase One’s design-build process can produce.

Homeowners are invited to visit Phase One Landscapes’ Google Business profile to read client reviews and feedback, or to schedule a consultation to connect with the team and begin planning their pool and spa landscape project.


About Phase One Landscapes

Phase One Landscapes is a full-service landscape architecture and construction firm based in Denver, CO. Founded in 1994, the company specializes in designing and building fully custom outdoor living environments that blend craftsmanship, functionality, and long-term performance. From concept to completion, Phase One Landscapes delivers personalized service, fair market value pricing, and award-winning results for residential clients throughout the Denver metro area and Colorado Front Range.

Phase One Landscapes is a proud member of the American Society of Landscape Architects (ASLA) and the Association of Landscape Contractors of Colorado, reflecting the company’s commitment to industry standards and professional excellence.

Contact:

Phase One Landscapes
(303) 750-6060
email@phaseonelandscapes.com

August 7, 2026 by Admin 0 Comments

Four Seasons, One Water Feature: A Denver Homeowner’s Guide to Year-Round Care in Colorado

Water feature maintenance in Denver requires a different approach when compared to other areas of the country due largely in part to Colorado’s altitude, freeze-thaw cycles, and hard water, leading to the creation of conditions most homeowners don’t anticipate. At Phase One Landscapes, we’ve been designing, building, and maintaining custom ponds, waterfalls, fountains, and pondless systems across the Greater Denver Metro and Front Range since 1994, and the seasonal demands here are real. This guide walks you through what your water feature needs across all four Colorado seasons, why timing is important, and when it’s worth calling in a professional.

The Short Answer: What Denver Water Features Need Each Season

Denver water features require four distinct maintenance phases all tied specifically to Colorado’s climate. Spring startup, running roughly April through May, restores equipment after winter shutdown to re-establish biological filtration. Summer focuses on water quality, evaporation management, and debris control, while fall prepares systems before the first hard freeze. Winter shutdown and winterization protects pumps, plumbing, and liners from Colorado’s repeated freeze-thaw cycles.

Season Key Tasks Timing DIY or Pro
Spring Startup Pump reinstall, filter cleaning, bacteria treatment Late March to May Both
Summer Operation Debris removal, water top-off, algae management June through August Mostly DIY
Fall Preparation Pump removal, debris clearing, winterization September to November Both
Winter Shutdown Monitor, de-icer check (koi ponds), visual inspection November through March Mostly DIY

Why Denver’s Climate Makes Water Feature Care Different

Altitude and UV Intensity

Altitude alone changes the math on water feature maintenance. At Denver’s elevation, UV intensity is higher than at sea level, which means liner materials degrade faster and algae can grow more aggressively in summer than homeowners coming from lower-elevation states expect. A water feature that was low-maintenance in Atlanta or Portland can seem like a full-time job in Colorado without the right seasonal approach.

Freeze-Thaw Cycles

Freeze-thaw cycles are the other force that surprises people. Denver doesn’t experience one sustained winter freeze the way northern climates do. Instead, temperatures can drop below freezing overnight and climb into the 50s or 60s the following afternoon, sometimes multiple times in a single week. That repeated expansion and contraction puts stress on plumbing fittings, pump housings, and liner seams if a system hasn’t been properly shut down.

Hard Water and Cottonwood Season

Denver’s hard water adds a third layer of complexity. Mineral scale accumulates faster here than in most markets, building up inside pump impellers and staining fountain surfaces in ways that compound if left unaddressed year after year. Cottonwood season, which runs roughly late April through June, adds to the workload by packing skimmer baskets so fast that weekly checks become necessary. These are the conditions we manage for every water feature project we build and maintain across Denver and the Front Range.

Spring Startup: Bringing Your Denver Water Feature Back to Life

Timing is Key

Spring is the most important maintenance window of the year, and what you do, or don’t do, in April sets the condition of your water feature for the next eight months. In Denver, we don’t recommend restarting by calendar date. We go by temperature: your water feature’s biological system needs nighttime temps to be consistently above freezing and water temperatures to reach at least 50 degrees Fahrenheit before you introduce beneficial bacteria to a naturalistic system like a Biofalls-style pond. Restart too early and the bacteria won’t establish. Wait too long and algae gets a head start.

Pump Inspection

Pump inspection is the step homeowners most often skip, and it’s also one of the most consequential. After a Colorado winter, a pump that looks fine may have a cracked housing or a compromised impeller seal from freeze stress, so running a quick check before reinstalling it in the feature is worth the extra few minutes. If water output drops noticeably after startup, that’s a sign the pump took damage over winter, not a sign that it just needs time to warm up.

Cottonwood Season and Koi Ponds

Cottonwood season overlaps with spring startup and runs through June along the Front Range, and during this window skimmer baskets can fill in a matter of days, especially on properties with mature trees nearby. For koi pond owners, fish become active again as water warms and their metabolism increases, so resume feeding cautiously and in small amounts until water temperature is consistently above 50 degrees Fahrenheit. Spring inspection for Denver pond maintenance also includes a liner walk-through to catch any winter stress cracks or seam movement before water loss becomes a problem.

Spring Startup Checklist for Colorado Ponds and Fountains

  • Work through these steps in order when nighttime temperatures are consistently above freezing and water temps are approaching 50 degrees F.
  • Inspect the submersible pump for freeze damage before reinstalling.
  • Reinstall the pump and test flow rate at startup.
  • Clean filter mats and skimmer baskets thoroughly and remove all winter debris.
  • Check liner surfaces for cracks, bubbling, or seam separation.
  • Test the auto-fill valve to confirm it’s operating and filling to the correct level.
  • Apply the first beneficial bacteria treatment of the season once water temperature reaches 50 degrees F.
  • Inspect all plumbing connections and fittings for freeze stress.
  • Clear debris and sediment from the feature bottom.
  • Walk the waterfall and stream bed for stone displacement from winter freeze-thaw events.
  • Resume fish feeding gradually as water temperature climbs.
  • If the pump shows reduced output or any plumbing connection appears stressed, schedule a professional inspection before running the system at full capacity.

Summer Management: Keeping Denver Water Features Clear and Healthy

Evaporation and Water Restrictions

Denver’s summer brings intense UV, low humidity, and monsoon season, each of which creates specific water feature challenges. Evaporation runs faster here than most homeowners expect, and in a hot stretch a feature can lose one to two inches of water per week, which puts the pump at risk of running dry and damaging its impeller. Check water levels weekly and top off as needed, but first check Denver Water’s current restrictions, since outdoor water use limitations can affect how and when you refill.

Algae Management

Algae management is a summer constant in Colorado. The combination of UV intensity and warm water temperatures creates conditions where algae grows, particularly in features without adequate biological filtration. Beneficial bacteria treatments every one to two weeks during the operating season help maintain biological balance, though some string algae is normal in a naturalistic pond. It is not a sign of system failure, and treating it with chemicals in a koi pond can do more harm than good. Water feature cleaning in a naturalistic system is about balance, not sterility.

Hard Water and Heat Waves

For fountains and architectural water features, Denver’s hard water becomes most visible in summer, as mineral scale accumulates on basin surfaces and pump components each time water evaporates in the heat. A diluted white vinegar solution handles mild deposits well and won’t damage most fountain materials. For koi ponds during heat waves when water temperatures climb above 80 degrees F, aerators become important because warm water holds less dissolved oxygen and fish will show signs of stress at the surface when levels drop. Monsoon season in July and August also brings wind-blown debris that loads skimmer baskets faster than the rest of the year.

DIY Tasks vs. Professional Service: A Practical Comparison

Owning a water feature doesn’t mean becoming a full-time maintenance technician. Most weekly tasks are straightforward, and the seasonal transitions, spring startup and fall shutdown, are where professional eyes catch what homeowners miss. If you’re looking for consistent, expert support across the season, our seasonal maintenance services are built for exactly that.

Homeowner Tasks Professional Service
Check and empty skimmer baskets weekly Spring startup pump inspection and reinstallation
Top off water levels Liner integrity assessment
Remove visible surface debris Plumbing and fitting inspection
Light algae brushing on fountain surfaces Deep filter cleaning and media replacement
Monthly visual pump check Pump servicing or replacement
Monitor fish behavior for signs of stress Water quality testing and balancing
Fall winterization and full system shutdown

Fall Preparation: Getting Your Water Feature Ready for a Colorado Winter

Preventing Damage

Fall preparation is where the most preventable damage happens to most water features, and the mistake is rarely negligence, it’s all about timing. Homeowners often treat winterization as a November task, but the Front Range can see hard freeze events in late September or October, and once a pump freezes in place, the repair cost is almost always higher than the cost of an earlier shutdown would have been.

Optimal Timing

Our recommendation is to begin fall prep when nighttime temperatures are consistently dropping below 50 degrees F, not when the calendar hits a certain date. For Front Range properties at typical Denver elevations, that often means mid-to-late October, and at higher elevations in the foothills, it can be a month earlier. Treating winterization as a temperature-driven task rather than a seasonal ritual is one of the better habits a water feature owner can develop.

Naturalistic Systems

For naturalistic systems, including Biofalls-style ponds, koi ponds, and pondless waterfalls, the process starts with the fish. Stop feeding when water temperatures drop below 50 degrees F, because fish metabolism slows at that threshold and uneaten food becomes organic waste that degrades water quality under the ice all winter. Remove the submersible pump before any hard freeze, clean filter mats and skimmer baskets thoroughly, and consider a cold-water beneficial bacteria treatment to reduce organic breakdown during the shutdown period. Leaf and debris removal is also important before the feature closes, since organic matter decomposing under ice all winter creates conditions that are hard on both fish and the feature itself.

Architectural Water Features and Fountains

For architectural water features and formal fountains, fall means a full drain and a blowout of plumbing lines. Don’t assume a fountain basin will be fine if it holds residual water, because Colorado’s freeze-thaw cycles will find any water left in the system. Pump components should come indoors for winter storage, and basin surfaces should be cleaned of mineral deposits before the season closes. For full details on the winterization process, our guide to Denver water feature winterization explains more.

Fall Shutdown Checklist: Naturalistic vs. Architectural Water Features

For naturalistic features (ponds, Biofalls systems, koi ponds, pondless waterfalls):

  • Stop fish feeding when water temperature drops consistently below 50 degrees F.
  • Remove and store the submersible pump before the first hard freeze.
  • Clean all filter mats and skimmer baskets thoroughly.
  • Remove aquatic plant debris and trim back dying material.
  • Add a cold-water beneficial bacteria treatment to reduce organic breakdown over winter.
  • If fish are overwintering, consider a pond aerator or de-icer to maintain a gas exchange opening through the ice.

For architectural features (formal fountains, pool-style water features):

  • Fully drain the water basin and blow out plumbing lines to clear any remaining water.
  • Remove and store pump components indoors.
  • Clean all mineral deposits from basin surfaces.
  • Inspect for any surface cracks or liner stress before spring.

Winter: What Happens to Your Denver Water Feature When It’s Off

Koi Ponds in Winter

Many homeowners assume winter means no maintenance, and that’s mostly true with one important exception: koi ponds with fish overwintering. Without a de-icer or aerator maintaining a gas exchange opening through the ice, toxic gases from decomposing organic matter build up under the surface and can harm or kill fish. The feature doesn’t need to be running, but that opening in the ice matters throughout the cold months.

Pondless Systems and Dry Features

For pondless systems and dry features after pump removal, the winter requirement is minimal. A periodic visual check after significant freeze-thaw events is worthwhile to catch any stone or liner movement before spring. Colorado’s winters don’t produce one clean freeze. They cycle repeatedly through freeze and thaw, and features that weren’t fully drained can absorb snowmelt and refreeze in ways that cause damage that only shows up at startup.

Fountains and Architectural Water Features

For fountains and architectural water features, confirm that full drainage holds through the first hard freezes and check after the season’s first significant thaw for any water infiltration, liner movement, or surface cracking. The features that need the most attention in spring are usually the ones that weren’t fully dried in fall, which is another reason the fall shutdown process is worth doing carefully. Our team follows up on completed projects as part of our post-project care program, including a 30-day check-in and coverage under our 2-year hardscape warranty.

Water Feature Types We Maintain in Denver: One Approach Does Not Fit All

Koi Ponds and Naturalistic Ponds

Different water features have different seasonal care needs, and treating them the same way is one of the more common sources of problems we see. Koi ponds and naturalistic ponds rely on a living biological filtration system where the beneficial bacteria colony that keeps the water clear and healthy must be re-established each spring and protected in fall. Fish add a layer of seasonal responsibility that a pondless system simply doesn’t have, and that distinction shapes every maintenance decision from April through November.

Pondless Waterfalls and Cascading Systems

Pondless waterfall systems have lower maintenance demands than koi ponds, but the hidden reservoir is where debris accumulates out of sight, and seasonal attention to the pump box and reservoir interior keeps these systems running cleanly. Cascading waterfall and stream systems need an annual inspection for stone displacement, which is common after hard winter freeze-thaw cycles and summer storm events.

Water Feature Fountains and Bubbling Rocks

Water feature fountains and bubbling rocks are simpler mechanically, but Denver’s hard water causes pump impeller clogging over time. Regular cleaning prevents the gradual flow reduction that signals a pump is working harder than it should, and catching that early extends the life of the pump considerably.

Architectural Water Features

Architectural water features, maintained more like a small pool with chemical balance, UV filtration, or ozone generators, require a different care approach than naturalistic systems. Not treating them appropriately leads to either over-treatment or under-treatment, both of which create problems that are harder to correct mid-season.

When to Call a Professional: Signs Your Water Feature Needs Expert Attention

Some problems are obvious, but many problems start out as something subtle that’s easy to rationalize away. The following are the signs we’ve learned over the years that something needs a professional look before it gets worse.

  • Pump runs but water output has dropped: This typically means a clogged impeller, a failing seal, or a plumbing restriction. Running a compromised pump doesn’t clear the problem; it accelerates wear.
  • Persistent murky or green water despite regular bacteria treatments: This often indicates an imbalanced biological system, inadequate filtration, or a liner issue allowing soil intrusion. The fix is usually not more bacteria.
  • Visible liner damage, soft spots, or bubbling in the feature floor: This needs assessment before water loss becomes significant. A small liner repair addressed early is far less disruptive than a full liner replacement.
  • Water level that drops faster than evaporation alone can explain: This is a slow leak until proven otherwise, and a liner shifting over time compounds the problem.
  • Any pump or plumbing component that experiences freeze damage from improper winterization: This should always be inspected before the system runs again.
  • In a koi pond, fish gasping at the surface or showing lethargy: If occurring outside of normal seasonal behavior, this is a signal that dissolved oxygen, water quality, or temperature stress is at a concerning level.

After more than 35 years of designing, building, and helping to maintain water features of all types, we’ve seen every one of these failure modes, and the majority are preventable with consistent seasonal care. If something looks off, or you want help with recurring maintenance, reach out to through our Contact Page, or call us at 303-750-6060.

What 35 Years of Denver Water Feature Work Has Taught Us

Winterization Timing

The most consistent mistake we see is winterizing too late. Homeowners wait until November because that feels like winter, but Denver’s shoulder season is deceptive. Nights in late September and October can drop below freezing, and a pump left in a feature through that first hard freeze often doesn’t come out undamaged.

Beneficial Bacteria Importance

Beneficial bacteria is the foundation of a healthy naturalistic water feature, and homeowners who skip or delay the spring bacteria treatment when water temps reach 50 degrees F end up fighting algae and water clarity problems all summer. The bacteria is the filtration system, and treating it as optional rather than foundational is one of the more predictable paths to a difficult season.

Denver’s Hard Water

Denver’s hard water is underestimated by nearly every homeowner who hasn’t lived with a water feature through multiple seasons here. Mineral scale builds faster than most people expect, and pump impellers that clog quietly over two or three years of scale accumulation are much harder to remediate than they would have been with routine cleaning each season.

Continuous Operation

A Biofalls naturalistic system is designed to run continuously during the operating season. Shutting it off for extended periods during summer, thinking you’re saving on electricity, disrupts the biological cycle and causes water quality problems that are harder to correct than the energy savings are worth.

Long-Term Durability

The features that hold up best across decades are the ones where the homeowner stays engaged with seasonal care. We build with that long-term durability in mind, which is why our work is backed by a 1-year plant warranty and a 2-year hardscape warranty, and why we’ve been recognized by the Association of Landscape Contractors of Colorado with 17 projects awarded since 1987, including 4 Grand Awards.

Frequently Asked Questions About Water Feature Maintenance in Denver

When should I shut down my pond or water feature in Denver?

Timing depends on nighttime temperatures, not the calendar. We recommend beginning shutdown when nights consistently fall below 40 to 50 degrees F and always before a hard freeze. On the Front Range that typically means late October to mid-November, but at higher elevations or in exposed locations, it can be weeks earlier.

How often should I clean my water feature?

Skimmer baskets need checking weekly during cottonwood season, which runs late April through June, and after any significant storm. Filter mats need cleaning monthly during the operating season, and a thorough deep clean at spring startup, before restarting the pump, sets the feature up well for the months ahead.

Can I leave my fountain running through a Denver winter?

Most residential fountains should be fully shut down and drained for winter. Colorado’s freeze-thaw cycles can crack pump housings, split plumbing fittings, and damage fountain basins even in features that seem frost-tolerant, and the cost of a proper shutdown is always less than the repair.

What causes murky water in my Denver pond?

Murky water usually signals an imbalance in biological filtration. Too much organic debris, insufficient beneficial bacteria, or a filter that needs cleaning are the most common causes, and Denver’s intense UV also accelerates algae growth in summer, which can cloud water quickly. For persistent murky water, a professional can identify whether the problem is filtration, debris load, or something structural.

Your Denver Water Feature Deserves Year-Round Stewardship

Colorado’s climate is demanding in specific ways, and a water feature that gets consistent, seasonally appropriate attention will look better, last longer, and cost less to maintain over time than one that only gets care when something goes wrong. At Phase One Landscapes, we’re not a company that installs a feature and moves on. Our in-house team, the same people who design and build these features, stays involved through post-project care, seasonal check-ins, and the warranty program that backs our work.

We’ve been doing this work across Denver, Cherry Hills Village, Greenwood Village, Littleton, Highlands Ranch, Parker, Castle Rock, and Boulder for more than 30 years, and our team has the tenure to match. If you have a water feature that needs a seasonal check-up, or if you’re planning to add one and want to understand what long-term care actually looks like, we’re available to talk. Reach out through our Contact Page, or call us at 303-750-6060, Monday through Friday, 8am to 5pm, or Saturday by appointment.


About Phase One Landscapes 

At Phase One Landscapes, we put your goals at the center of every design. With years of hands-on experience across Colorado, a passion for creativity, and a commitment to honest, friendly service, we’d be honored to guide your landscape transformation.

Ready to bring your dream yard to life? Contact us today for a consultation—let’s start the next chapter of your outdoor story together.

We can’t wait to hear your ideas—and turn them into reality!

Picture of Written by Dave Graham

Written by Dave Graham

Dave is a Denver native and co‑founder of Phase One Landscapes. After earning a B.S. in Landscape Architecture from Iowa State University in 1981, he worked as a laborer, construction foreman, and designer, learning residential design/build from the ground up. In 1988 he partnered with Dennis Frank to launch Phase One Landscapes, which has delivered hundreds of landscapes across Greater Denver. Dave prioritizes quality and service and remains involved with clients and teams. The firm’s projects have earned ALCC awards, appeared on ASLA Garden tours, and been published in national and local magazines.
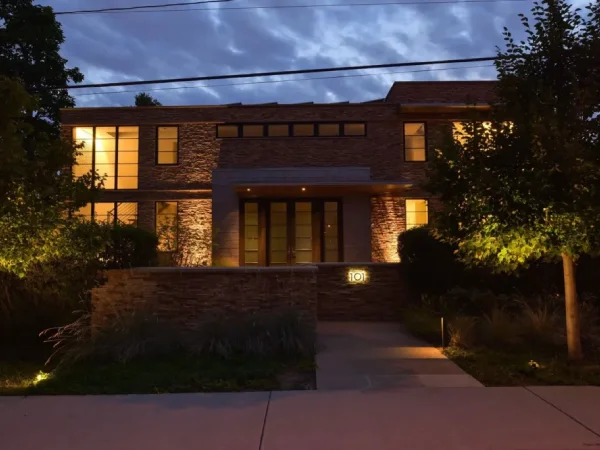
View Dave Graham Profile

August 6, 2026 by Admin 0 Comments

Your Pool or Spa Deserves More Than Summer: Designing a Denver Backyard That Works All Year

Pool and spa landscaping that actually works across all four seasons requires more than a deck and some chairs. At Phase One Landscapes, we design pool-centered outdoor environments with functional zones, climate-adapted planting, fire features, and covered structures built for the Front Range’s freeze-thaw cycles, intense UV, and cool shoulder-season evenings. With 30+ years designing outdoor living spaces in Denver, we know the difference between a pool that extends your season and one that shuts down your yard in September.

Why Most Denver Pool Landscapes Stop Working in September

Most pool or spa landscapes are designed for July. The photos look great, the tile is beautiful, and the deck furniture is perfectly arranged. Then Labor Day arrives, and nobody goes outside anymore.

The problem is that summer-only thinking ignores what makes Denver’s outdoor season genuinely livable. Cool nights start creeping in by late August. UV exposure stays intense through October, making unshaded decks uncomfortable even on warm afternoons. Wind picks up in fall, and an open pool deck with no screening turns into the last place anyone wants to sit.

Without a custom outdoor fire feature or fireplace to take the chill off a cool evening, without a pergola to cut the glare on a bright October afternoon, and without wind screening along the exposure that matters most on your specific lot, your pool or spa becomes a visual centerpiece for eight months and an actual outdoor destination for two. We’ve seen this pattern repeated on Front Range properties from Greenwood Village to Castle Rock, and it’s entirely preventable with the right design framework from the start.

Denver’s Climate Demands a Different Approach to Pool and Spa Landscape Design

Denver’s Climate Demands a Different Approach to Pool and Spa Landscape Design

Designing for Denver means accounting for conditions that most pool and spa landscaping guides don’t address. Our article on designing for Denver’s microclimates goes deeper into this, but here are the four factors every spa or pool landscape on the Front Range must address:

  • Freeze-thaw cycles: Denver experiences freeze-thaw events per year at elevation. Poorly selected or installed coping, decking, and hardscape joints fail faster here than almost anywhere else in the country.
  • High-altitude UV: The sun at Denver’s elevation degrades materials, stresses plants, and makes unshaded pool decks physically uncomfortable during peak summer hours.
  • Seasonal wind exposure: Open lots in Parker and Castle Rock face different wind loads than urban Denver yards in Hilltop or Cherry Hills Village. Wind screening needs to be site-specific, not generic.
  • Water restrictions and semi-arid conditions: High-water planting around a pool creates ongoing maintenance problems and conflicts with Denver-area water restrictions. Water-wise plant selection is a design requirement, not a preference.

We design spa and pool landscapes specifically for these conditions across the Greater Denver Metro area. The approach that works on an elevated Parker lot differs from what we specify for a more sheltered Greenwood Village backyard, and that site-specific thinking is what separates a landscaped outdoor space that holds up from one that starts failing after the first winter.

Schedule a design consultation to walk through your pool or spa area and explore what a year-round outdoor environment could look like for your home. Explore our pool and spa landscaping work to see how we design for Denver’s four seasons.

What Freeze-Thaw Cycles Do to Pool Coping and Decking

Coping is one of the most vulnerable points in a Denver spa and pool landscape. When water infiltrates the joint between the coping and the pool shell, then freezes and expands, you get cracking, lifting, and separation. This is one of the most common and preventable failures we see on the Front Range.

The fix starts at the material selection stage, not after the damage is done. Our article comparing pavers vs. concrete vs. natural stone guide covers the trade-offs in detail, but the short version is this: freeze-thaw performance has to be part of the selection criteria, not an afterthought. Our landscaping design/build processes mean material decisions are made with long-term performance in mind from day one, not based on upfront cost alone.

The Six Zones Every Pool or SpaLandscape Design Needs

The Six Zones Every Pool or Spa Landscape Design Needs

The most functional pool and spa landscapes we design aren’t built around a single open deck. They’re organized as a series of interconnected zones, each serving a specific purpose and each making the others work better. Here’s how we think about it:

  1. Pool circulation perimeter: This is the immediate decking around the water that’s slip-resistant, properly drained, and wide enough for safe movement. Material selection here directly affects freeze-thaw performance and long-term maintenance.
  2. Lounge zone: A sun-exposed seating area positioned to take advantage of your best solar orientation. Thinks chaise lounges, a conversation set, or a daybed layout that all depend on getting the sightlines, sun angle, and distance from the water right.
  3. Dining and outdoor kitchen zone: A partially covered or shaded area for meals and entertaining. Separating the dining zone from the lounge zone creates a more functional backyard and opens the door for outdoor kitchen integration when that fits the scope.
  4. Covered structure or pergola: A shade structure over the lounge or dining zone extends usability on hot August afternoons and cool shoulder-season evenings when you’d otherwise retreat inside. We cover material and placement considerations in the section below.
  5. Fire feature area: A fire pit or outdoor fireplace positioned for evening use is one of the highest-value additions in the Denver climate. More on that below.
  6. Planted privacy buffer: Climate-adapted screening plants along the perimeter control wind, provide privacy from neighbors, and give the pool environment a sense of enclosure that makes it feel like an outdoor room rather than an open lot.

Not every project requires all six zones. Our design/build processes adapt to your site dimensions, HOA requirements, and how your family actually uses the space. But thinking in zones rather than simply a “deck around a pool” is what produces a great outdoor environment that works year-round.
Ready to talk through how these zones fit your property? Request an appointment, and let’s walk your yard together.

Adding a Fire Feature to Extend Your Pool Season

Denver temperatures can drop significantly after sunset, even in summer. A fire pit or fire table positioned near the pool zone directly solves that problem by making the outdoor space comfortable through cool spring and fall evenings when the pool may not be in use but the yard absolutely can be.

Gas-fed fire tables are a clean, low-maintenance option that work well in HOA communities where wood-burning is restricted. Wood-burning fire pits offer a different experience and work well on properties with more flexibility. We cover both on our fire and water features service page.

The key is designing the fire feature zone into the plan from the start. Gas line routing, hardscape layout around the feature, and seating arrangement all need to be coordinated at the design stage. A fire table added as an afterthought to an existing deck rarely sits in the right location or functions as well as one that was designed in.

Pergolas and Shade Structures Built for Colorado Conditions

Denver’s afternoon sun peaks from the southwest in summer, and UV intensity at our elevation is genuinely harsh. A properly oriented pergola or shade structure over the lounge or dining zone makes the pool deck usable on bright afternoons that would otherwise send everyone inside.

Material matters in Colorado’s freeze-thaw conditions. Powder-coated aluminum and treated hardwoods hold up better than standard cedar over time, which tends to check and split in our dry, high-UV environment. Eastern orientation for a primary shade structure protects from the most intense afternoon exposure. Our Outdoor Living and Pergolas service page covers the options in more detail and includes project examples from Front Range properties.

Choosing the Right Pool Deck Materials for Denver’s Weather

Choosing the Right Pool Deck Materials for Denver’s Weather

Pool decking is not the place to cut costs on pool and spa landscaping. Material failures adjacent to a pool or spa are expensive to repair and disruptive to the entire outdoor environment. Here’s how the three primary options compare:
MaterialDenver PerformanceKey Consideration
ConcreteAffordable upfront; prone to cracking and spalling in freeze-thaw cycles without proper installation and annual sealingRequires excellent installation; cracked concrete is difficult to repair cleanly
PaversBetter freeze-thaw resilience because individual units can shift slightly without cracking the whole field; textured finishes improve slip resistanceHigher upfront cost than poured concrete; easier to repair individual units
Natural StoneTravertine and flagstone offer strong aesthetics; some stone absorbs significant heat under Denver's UV; sealing requiredSpecies selection and sealing protocol matter greatly; some stones perform poorly if not properly specified

The right choice depends on your site, your budget, and what level of maintenance you’re comfortable with over time.

Plant Selection and Landscaping Around Your Denver Pool or Spa

Plant Selection and Landscaping Around Your Denver Pool or Spa

Spa or Pool area landscaping in Denver requires a different approach than a standard planting plan. The wrong choices create real problems: deciduous trees drop leaves directly into the water, high-water plants conflict with Denver-area restrictions and struggle in dry spells, and aggressive root systems can damage pool infrastructure over time. We design planting plans around three functions for a pool or spa environment: privacy screening, seasonal color and movement, and wind buffering. Here are the plant categories that work consistently in our Front Range climate:
  • Ornamental grasses (Blue Oat Grass, Karl Foerster): Soften hardscape edges, add movement in wind, and provide year-round structure without dropping debris into the pool.
  • Drought-tolerant flowering shrubs (Salvia, Penstemon, Russian Sage): Deliver seasonal color and pollinator value with minimal water demand once established.
  • Evergreen screening plants (Sky Pencil Holly, Blue Spruce varieties): Provide year-round privacy and wind buffering, which is particularly valuable on exposed lots throughout the Front Range.
Every planting plan we produce accounts for Denver water restrictions and is backed by our 1-year plant warranty. Our irrigation team stays on-site for 3-4 weeks after installation to monitor plant establishment and calibrate the system, so the investment in plant material is protected from the start.
What Does Pool and Spa Landscape Design Cost in Denver

What Does Pool and Spa Landscape Design Cost in Denver?

We hear this question at every initial consultation, and we’d rather answer it directly than leave you guessing.

Every pool and spa landscape project that Phase One Landscapes designs and builds is priced to reflect the specific scope, site conditions, and materials involved. No two projects are identical, and the investment scales with the complexity of what’s included. Projects incorporating outdoor kitchens, premium natural stone, significant grading, or extensive drainage work naturally represent a broader scope and budget. What stays consistent across every project is our commitment to fair market value pricing and a detailed budget analysis delivered early in the process.

Here’s what drives cost on the majority of pool and spa landscape projects:

  • Site conditions and grading challenges (sloped lots and poor soil drainage add complexity and cost)
  • Decking square footage and material choice (natural stone vs. pavers vs. concrete)
  • Scope of structures (pergola only vs. pergola plus fire feature vs. full outdoor kitchen integration)
  • Planting scope and irrigation design
  • Drainage system complexity around the pool perimeter

We provide transparent estimates with documented change orders throughout the project. We price at fair market value for work done right the first time, and if something unexpected comes up once we’re in the ground, we talk through the options clearly rather than presenting a bill at the end.

If you’re exploring your first spa or pool landscape project and aren’t sure where your scope lands, the design consultation step is the right starting point. There’s no pressure commitment involved, and it gives you a realistic picture of what your site and goals require.

Contact Phase One Landscapes today to schedule your design consultation. We’ll walk with you through your pool area and explore what a year-round outdoor environment could look like for your home.

Pricing, availability, square footage, floor plans, features, and home specifications are subject to change without notice. Please contact us to confirm current details before making any purchase decision.

How the Phase One Design-Build Process Works for Pool Landscapes

How the Phase One Design-Build Process Works for Pool Landscapes

Our process keeps one team with you from the first site visit through post-build check-ins. Here’s how it works in practice:

  • Initial design consultation: We walk the site with you, listen to how you use your outdoor space and what you want from it, and begin identifying site-specific challenges around drainage, grading, sun orientation, and wind exposure.
  • Design development: Our landscape architects develop a zoning plan specific to your property, selecting materials, plant palettes, and hardscape layouts that account for Denver’s climate conditions. A detailed budget analysis is presented before construction begins.
  • Construction: Our in-house team manages construction with the same designer and project manager involved throughout. We handle all subcontractor coordination; there are no handoffs that create gaps in design intent or accountability. Every site has unknowns once excavation begins, and we plan for contingencies and handle changes through documented change orders with clear communication.
  • Post-build stewardship: We conduct a 30-day satisfaction check-in, and our irrigation team monitors plant establishment for 3-4 weeks after installation. Every project is backed by a 1-year plant warranty and a 2-year limited hardscape warranty.

Working with the Phase One Landscapes team partners you with our construction manager has been with the company for 31 years. Our senior designer has been with the company for over 20 years. That continuity is rare in this industry, and it matters on a complex spa or pool landscape project where consistent oversight directly affects the outcome. Our landscape architecture page explains our processes in full detail.

Denver Pool and Spa Landscaping: What to Expect at Each Stage of the Project

Here’s a realistic timeline for a pool landscape project in the Denver area:

  • Design phase (4-8 weeks): Site assessment, concept development, design refinement, and budget analysis. This phase sets the foundation for everything that follows.
  • Permitting and HOA approvals (variable): Many community HOAs have distinct review processes that we handle regularly for our clients. Municipal permitting timelines also vary by jurisdiction. We handle all permit management in-house.
  • Construction (8-16 weeks): This depends on project scope, weather windows, and site complexity. Denver’s construction season has real constraints, meaning starting a pool landscape in late summer may push completion into fall.
  • Post-build establishment (4-6 weeks): Plant establishment, irrigation calibration, and the 30-day check-in period.

Our advice is to plan 12-18 months ahead for a project you want finished by a target season. We serve Denver, Cherry Hills Village, Greenwood Village, Littleton, Highlands Ranch, Parker, Castle Rock, Boulder, and other Front Range cities, and we’re familiar with the permitting, HOA restrictions, and site conditions across all of these areas.

Ready to Design Your Year-Round Pool or Spa Landscape in Denver?

The principles that make a local pool or spa landscaping work across all four seasons aren’t complicated, but they require planning from the start. The key is to design for all four seasons, not just July. Organize the space into functional zones. Choose materials rated for freeze-thaw performance. Use climate-adapted planting that meets water restrictions and doesn’t create maintenance problems. Work with one accountable partner who stays with the project from the first site visit through final walkthrough and post-build stewardship.

At Phase One Landscapes, we’ve been designing and building pool landscapes on the Front Range since 1994. We’ve earned 13 Associated Landscape Contractors of Colorado ELITE Awards and 4 Grand Awards, and we’ve had 21 projects shown in the Colorado Chapter of the American Society of Landscape Architects. Those credentials reflect the quality of work you can expect and the standards we hold ourselves to on every project.

Schedule Your Design Consultation to walk through your pool or spa area and explore what a year-round outdoor environment could look like for your home.

View Our Pool and Spa Project Gallery to see how we’ve designed pool-centered outdoor environments across the Denver Metro area.

Related Resources

If you’re planning a pool or spa landscape or exploring what’s possible for your outdoor space, these guides cover the topics that come up most in our design consultations:


About Phase One Landscapes 

At Phase One Landscapes, we put your goals at the center of every design. With years of hands-on experience across Colorado, a passion for creativity, and a commitment to honest, friendly service, we’d be honored to guide your landscape transformation.

Ready to bring your dream yard to life? Contact us today for a consultation—let’s start the next chapter of your outdoor story together.

We can’t wait to hear your ideas—and turn them into reality!

Picture of Written by Dave Graham

Written by Dave Graham

Dave is a Denver native and co‑founder of Phase One Landscapes. After earning a B.S. in Landscape Architecture from Iowa State University in 1981, he worked as a laborer, construction foreman, and designer, learning residential design/build from the ground up. In 1988 he partnered with Dennis Frank to launch Phase One Landscapes, which has delivered hundreds of landscapes across Greater Denver. Dave prioritizes quality and service and remains involved with clients and teams. The firm’s projects have earned ALCC awards, appeared on ASLA Garden tours, and been published in national and local magazines.
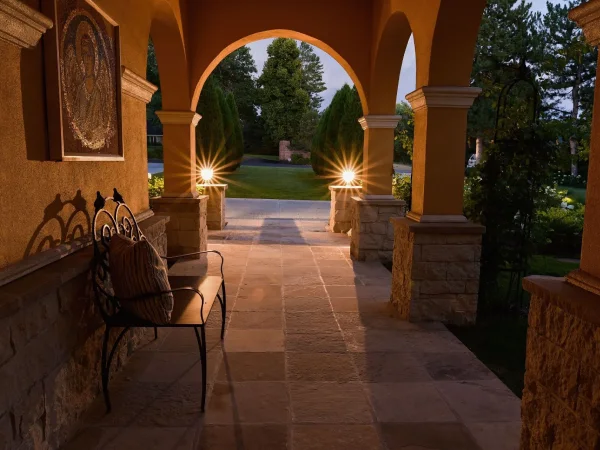
View Dave Graham Profile

August 6, 2026 by Admin 0 Comments

Designing a Backyard That Actually Gets Used: Denver Patio and Deck Planning for Real Life

Good patio and deck layout starts with how your household actually lives outdoors, not with which materials are trending this season.

At Phase One Landscapes, we’ve been designing and building custom outdoor spaces across the Denver Metro and Front Range since 1994, which means we’ve seen what works on a sloped lot in Castle Rock, what holds up through a Cherry Hills Village HOA review, and what actually gets used on a Tuesday morning versus what gets used only at parties. This article walks through patio and deck design organized around three real uses: entertaining, privacy, and everyday comfort, so you can see how these decisions connect before a single stone is placed.

Quick Answer: How Should You Lay Out a Patio or Deck?

Divide the space into functional zones based on how your household actually uses the outdoors. Place dining within 10 to 12 feet of the back door, position a lounge or fire pit area as a focal point slightly lower or further from the house, and carve out a quieter corner for daily use. Grading, drainage, and sun orientation shape every one of those decisions before materials are chosen.

Why Layout Comes Before Materials (and Before the Budget Conversation)

Most homeowners arrive at a first meeting already committed to a material. They want pavers, or they’ve seen a composite deck they like, and they’re ready to talk cost. That’s a natural starting point, but it skips a step that changes everything downstream.

Layout determines how a space functions. A dining area placed too far from the kitchen door becomes a frustration during every dinner party. A lounge zone that faces west without shade becomes unusable on summer afternoons. A fire pit dropped in the wrong corner creates a traffic bottleneck.

Our custom landscape design process starts with a site assessment before we discuss materials at all. In Denver, that means looking at your lot’s grading and drainage first, because clay-heavy soils don’t shed water quickly and a poorly placed sunken seating area becomes a drainage problem after the first heavy rain. We also map sun and wind exposure, since a west-facing deck in the Denver Metro can be brutal by 3 p.m. without a shade structure planned into the layout from the start. Colorado’s freeze-thaw cycles affect footing depths, joint widths, and base preparation, which means those decisions happen at the design stage, not during construction. The same in-house designer who walks your site on day one stays with you through the landscape construction process and close-out, so nothing gets lost between the drawing and the build.

Patio and Deck Layout Ideas for Outdoor Entertaining

Patio and Deck Layout Ideas for Outdoor Entertaining

Entertaining layouts work best when they’re organized around three zones: dining, lounging, and a focal gathering point. Each zone has a job, and the layout should make moving between them feel natural. 

The Dining Zone

The dining zone belongs within 10 to 12 feet of the back door. That proximity sounds minor, but it matters every time someone carries a platter from the kitchen. Placing it too far out adds steps, slows service, and means guests drift away from the house. The dining zone also benefits from being on the same level as the interior floor, which makes indoor-outdoor movement effortless. 

The Lounge or Conversation Zone

The lounge or conversation zone works well at a slightly lower elevation, separated from the dining area by 18 to 24 inches. That elevation change defines two spaces without needing a wall or a fence. It also creates a “room within a room” feeling that makes outdoor entertaining feel intentional rather than improvised. 

The Fire Pit or Focal Gathering Area

The fire pit or focal gathering area should be visible from inside the home and positioned as a natural draw away from the dining table. An outdoor fire feature pulls guests toward it, which opens up space around the grill and dining area during larger gatherings. We’ve designed entertaining spaces in Greenwood Village and Highlands Ranch where the fire feature becomes the reason guests linger for two more hours after dinner.

Each of these elements carries a design-build implication. A sunken conversation pit requires careful drainage planning because Denver’s clay soils hold water rather than shed it. A pergola anchoring the entertaining space needs footings set at Colorado’s frost line to handle freeze-thaw heave. A multi-level deck on a sloped lot requires retaining wall coordination from the start, not as an afterthought. We think through all of this at the design stage, which is why the same team that draws it builds it. We’re outdoor patio and deck builders who care as much about what’s underneath the surface as what’s on top of it.

Choosing Between a Paver Patio and a Deck for Your Entertaining Space

This is one of the most common questions we field, and the honest answer depends on your lot more than your preferences.

  • Paver patios: work well for ground-level spaces on relatively flat lots. They offer design flexibility through patterns, borders, and mixed materials, and they handle the transition between interior flooring and the outdoors naturally. In Denver, pavers need proper joint sand and annual resealing with a penetrating sealer. Siloxane or Saltguard are both solid options to resist the freeze-thaw damage that breaks down unsealed surfaces over time. Pavers installed effectively will outlast cheaper alternatives by decades. Working with experienced paver installers who understand the base preparation requirements for Colorado’s clay soils makes a real difference in longevity.
  • Composite decks: make more sense on sloped lots where grading a flat paver surface would require significant excavation and fill. Products like Trex, Fiberon, and Weatherbest hold up better against UV exposure than natural wood, which is relevant at Denver’s elevation where UV intensity is meaningfully higher than at sea level. Composite decking still requires proper substrate drainage to prevent moisture issues, so that part of the design conversation matters regardless of the surface you choose.
  • Natural stone: is durable and distinctive, but it requires careful base preparation given Denver’s clay soils and frost line depth. It’s a long-term investment that rewards proper installation.
Patio Layout Ideas for Privacy: Creating a Space That Feels Like Your Own

Patio Layout Ideas for Privacy: Creating a Space That Feels Like Your Own

Privacy is one of the more personal parts of outdoor design. What feels private enough for one household feels exposed to another. In Denver Metro suburbs, where lots often sit closer together than homeowners realize and streets can run directly past the backyard, privacy planning matters.

Pergolas with lattice panels or climbing plants create vertical separation without the flat, institutional look of a solid fence. A well-designed pergola gives a patio a “room” feeling while filtering sightlines at seated height. In communities like Parker and Highlands Ranch, where HOA guidelines often restrict fence heights and styles, pergolas offer a path to privacy that typically clears review. We know these HOA requirements well, because we’ve worked across all of these communities for decades.

Berms and raised planters along the perimeter create visual separation at seated height without any vertical structure at all. A planted berm softens the edge of a property line while adding color and texture. Built directly into the patio hardscape, these planters also anchor the design and reduce the amount of open lawn that reads as “exposed.”

Positioning the main seating area away from the property line is simple but often overlooked. A patio pushed to the far edge of a lot sits right next to the neighbor’s yard. The same patio centered or pulled inward, with a planted buffer between it and the fence line, feels more protected with no additional structure required.

Two-story homes in the Denver Metro present a specific sightline challenge: neighboring upper-floor windows can see directly into a backyard seating area. The solution is usually vertical layering. For example, a pergola, a taller planted screen, or a combination designed to interrupt that sightline without creating a fortress. We apply the same approach here that we use with all Denver deck contractor work we perform: solve the functional problem first, then make it look right.

Any structure taller than certain thresholds, and this varies by municipality and HOA, will require a permit. We help manage that process as part of every project.

Low-Maintenance Privacy Solutions for Denver’s High-UV Climate

Low-Maintenance Privacy Solutions for Denver’s High-UV Climate

Colorado’s UV intensity is harder on materials than most homeowners expect. At elevation, surfaces that would last five or six years without maintenance in a milder climate need attention every one to two years here.

  • Wood structures: need staining and sealing on horizontal surfaces every one to two years. Vertical surfaces can go two to five years between treatments, but the horizontal planes – deck boards, pergola tops, and cap rails – face direct sun exposure and take the most wear. Composite decking fades less dramatically, but darker colors absorb more heat, which matters on a west-facing surface in July.
  • Concrete pavers: with a Siloxane or Saltguard penetrating sealer resist UV degradation better than unsealed concrete. Annual resealing is straightforward enough to do yourself or have us handle as part of ongoing maintenance.
  • For plant-based privacy: Arborvitae and native shrubs that are climate-adapted to Colorado’s conditions offer a softer alternative to structural screens. They also reduce the “wall-like” feeling that can make a backyard feel enclosed rather than private. A combination of structural elements and plant material usually gives the best result.

Deck and Patio Layouts for Everyday Use: Designing Around How You Actually Live

The layouts homeowners imagine during design are usually entertaining layouts, but the layouts that actually get used most often are quite different. A quiet morning coffee spot. A place to read. Somewhere for kids to play that doesn’t block the grill. These uses drive daily satisfaction, and they deserve as much attention as the entertaining zones.

The “quiet retreat” zone is a smaller seating area removed from the main entertaining space, often tucked near a garden bed or fence line. It doesn’t need to be large. A bistro table and two chairs in a corner with afternoon shade and good plant framing can become the most-used spot on the property.

Door placement determines daily flow. A sliding or French door that opens onto the patio creates an instinct to step outside throughout the day. A door that faces a fence or storage area doesn’t. We work with existing door placements when we’re redesigning an existing yard, and we coordinate with homeowners on new builds to make sure the back door opens to a surface that invites use.

Sun and shade orientation matter more for everyday use than for occasional entertaining. In Denver, west-facing patios without shade structure become unusable between 2 p.m. and sunset during summer.
Our site assessment includes sun mapping for the specific property so shade structures get placed where they actually block the sun, not where they look balanced on paper. If you want to see how these decisions come together in finished projects, view our Denver patio and deck builders portfolio page to get a sense of what site-specific layout design looks like in practice.

Multi-Zone Layouts for Smaller Lots in Denver and the Front Range

Smaller lots are a real constraint in Littleton, Parker, and parts of Highlands Ranch. The answer isn’t to scale down ambitions. It’s to layer vertically rather than spread horizontally.

Deck levels create zone separation without consuming square footage. A dining deck at door height with a small step down to a paver lounge area below it defines two spaces on a tight footprint. Built-in bench seating along deck edges eliminates the bulk of freestanding chairs and opens the center of the space for movement. Material transitions – a deck board surface giving way to a paver surface – read as zone boundaries without any physical barrier.

The deck builders Denver homeowners tend to work with don’t always think in these terms. We do, because we’ve built functional multi-zone outdoor spaces on smaller Front Range lots and know that the design conversation has to account for square footage from the first meeting.

A Realistic Budget Framing for Denver Patio and Deck Projects

What Drives Cost: A Realistic Budget Framing for Denver Patio and Deck Projects

We hear this from clients often: “I didn’t realize it would be this much.” That’s not a complaint about our pricing. It’s a reflection of how dramatically construction costs have shifted over the last decade and how little visibility most homeowners have into what drives those costs before they call a patio or deck builder.

Here’s the honest version. Our minimum project size is around $20,000, which covers a straightforward paver patio with proper base preparation and standard finishes. Most first-time clients investing in a full outdoor living environment fall between $80,000 and $120,000. That range covers a well-designed multi-zone patio or deck with shade structure, plantings, lighting, and irrigation. Projects that include pools, outdoor kitchens, significant retaining walls, or estate-scale site work go well beyond that, sometimes to $1 million or more.

What drives cost up from the base?

  • Site grading and drainage complexity. A sloped lot in Castle Rock or a heavily clay-heavy site in Boulder requires more prep work than a flat suburban lot. That work shows up in cost.
    • Material selection: Natural stone costs more than concrete pavers. Composite decking costs more than pressure-treated wood.
    • Structural elements: Pergolas, retaining walls, integrated lighting, and irrigation all add to the project cost, because they add real value and require real labor.
    • Multi-level vs. single-level layouts: Two levels require structural coordination that a single surface doesn’t.

We present a detailed budget analysis during the design phase so there are no surprises at project close. Our two-year limited hardscape warranty is part of every project, not an upgrade. If you’re ready to start making sense of what your specific site might cost, schedule a design consultation with our team today. That first conversation is about understanding your goals, not selling you a package.

What to Expect When You Work With Phase One Landscapes

What to Expect When You Work With Phase One Landscapes

We operate as a true turnkey design-build firm, which means one in-house team handles everything from the first site visit through post-project follow-up. Our design-build team is structured so that the designer who creates your layout is involved through construction. Our in-house project managers stay on the project from first meeting to final walkthrough meaning no “handoffs”, no “the designer is gone, no “talk to the foreman” moments.

Here’s how the process typically unfolds:

  • Initial consultation and site visit: We come to your property, walk the space, assess grading, drainage, sun exposure, and your lifestyle needs, and listen. This is not a sales meeting. It’s a listening exercise that shapes everything that follows.
  • Design phase: The same person who walked your site creates the layout. You see a preliminary plan with a detailed budget analysis before we move forward. Revisions happen at this stage, not after construction starts.
  • Construction phase: Our crews and subcontractors work under the oversight of the same project manager who knows your plan. We manage permits, scheduling, and subcontractor coordination entirely in-house.
  • Post-project care: We check in at 30 days. Our irrigation team monitors plant establishment for three to four weeks after installation. Our two-year limited hardscape warranty covers the work we’ve built.

We’ve been doing landscape design and construction in Denver and across the Front Range since 1994. Our work has earned 13 ALCC Awards of Excellence and Merit and 4 Grand Awards from the Association of Landscape Contractors of Colorado, with projects recognized by the Colorado Chapter of the American Society of Landscape Architects. About 60 percent of our new business comes from referrals, which tells us more about our work than any award does.

Whether you’re planning a patio or deck for a new build or a full backyard renovation, the process starts the same way: one conversation with one team that stays with you for the entirety of your project.
Ready to start your project?

Request an appointment for a design consultation with our team, or call us directly at (303) 750-6060.

Frequently Asked Questions About Patio and Deck Design in Denver

What is the best patio layout for entertaining?

Organize the space into three zones: dining near the back door, a lounge or fire pit area as the focal point with 18 to 24 inches of elevation separation from the dining zone if space allows, and a quieter corner for smaller conversations. Grading and sun orientation shape where each zone lands before materials are chosen. We evaluate all three during our initial site assessment.

How do I add privacy to my outdoor patio without a fence?

Pergolas with lattice or climbing plants, raised planters built into the hardscape perimeter, and positioning the main seating area away from property lines all create effective privacy without a solid fence. In Denver’s windy climate, any vertical pergola structure needs footings and lateral bracing sized for Front Range wind loads, which is part of the engineering we handle during the design phase.

What is the difference between a paver patio and a composite deck?

Pavers work best for ground-level spaces on relatively flat lots and offer flexibility in patterns and borders. Composite decking is better suited for sloped lots and elevated structures where grading a flat surface would require significant excavation. In Denver, both require climate-specific installation: paver joints need sealed joint sand to resist freeze-thaw damage, and composite decks need proper substrate drainage to prevent moisture issues at elevation.

How much does a patio or deck cost in Denver?

Costs range from approximately $20,000 for a straightforward paver patio to over $1 million for a full outdoor living environment. Our first-time clients typically invest between $80,000 and $120,000. Site grading, material selection, structural features like pergolas or retaining walls, and overall lot complexity are the primary cost drivers. We present a detailed budget analysis during the design phase so expectations are aligned before construction begins.

How long does it take to build a patio or deck in Denver?

After a signed construction agreement, we typically break ground within two to three months depending on design complexity, permitting timelines, and seasonal scheduling. The design phase itself varies based on project scope and revision cycles. Because the same team handles design and construction, delays from contractor handoffs and miscommunication don’t enter the picture.

Do I need a permit to build a deck or patio in Denver?

Permit requirements depend on the project’s size, height, structural elements, and whether the property falls under HOA guidelines. Most elevated decks and permanent pergola structures require permits in Denver and the surrounding communities. We manage the permitting process as part of every project, including navigating HOA requirements in communities like Highlands Ranch and Parker, so you don’t need to track down forms or chase municipal timelines.

Ready to Plan Your Denver Patio or Deck? Start With a Conversation.

The first meeting is a site visit, not a sales call. We come to your property, walk the space with you, and listen before we draw anything. The same person who takes that first call manages the project through completion.

Let’s talk about what your backyard could become. Call us at (303) 750-6060 to schedule your design consultation and set up your site visit. If you’d like to explore the full scope of what we build before reaching out, you can learn more about our patio and deck construction services and see the range of projects we’ve completed across the Denver Metro and Front Range.

Pricing, availability, square footage, floor plans, features, and home specifications are subject to change without notice. Please contact us to confirm current details before making any purchase decision.


About Phase One Landscapes 

At Phase One Landscapes, we put your goals at the center of every design. With years of hands-on experience across Colorado, a passion for creativity, and a commitment to honest, friendly service, we’d be honored to guide your landscape transformation.

Ready to bring your dream yard to life? Contact us today for a consultation—let’s start the next chapter of your outdoor story together.

We can’t wait to hear your ideas—and turn them into reality!

Picture of Written by Dave Graham

Written by Dave Graham

Dave is a Denver native and co‑founder of Phase One Landscapes. After earning a B.S. in Landscape Architecture from Iowa State University in 1981, he worked as a laborer, construction foreman, and designer, learning residential design/build from the ground up. In 1988 he partnered with Dennis Frank to launch Phase One Landscapes, which has delivered hundreds of landscapes across Greater Denver. Dave prioritizes quality and service and remains involved with clients and teams. The firm’s projects have earned ALCC awards, appeared on ASLA Garden tours, and been published in national and local magazines.
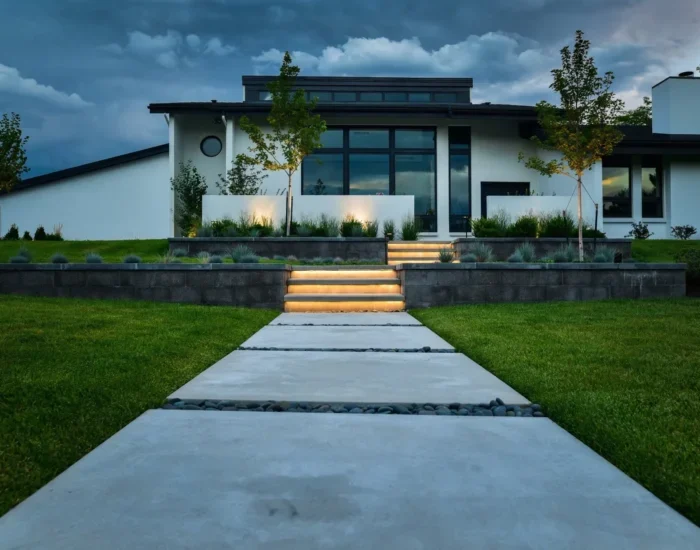
View Dave Graham Profile

July 10, 2026 by Admin 0 Comments

Low Water, High Impact: How to Build a Drought-Tolerant Denver Landscape That Actually Looks Stunning

Xeriscaping in Denver isn’t rocks and cactus. It’s a layered, colorful, habitat-friendly outdoor environment that uses far less water than a traditional lawn. Denver Water coined the term in the early 1980s, and the approach has only grown more relevant as our regional climate pressures intensify. At Phase One Landscapes we call it a Coloradoscape: a landscape built to thrive here, not just survive.

Most Denver homeowners who come to us expecting a sparse, gravel-covered yard leave that misconception behind quickly. What we actually build is something lush and intentional, with ornamental grasses catching the afternoon light, flowering perennials drawing pollinators, and shrubs that hold color from May through October. The goal is beauty and water efficiency at the same time, not a trade-off between them.

This page covers what xeriscape really is, why Denver homeowners are converting now, what the water savings actually look like in numbers, which plants perform best on the Front Range, how our design-build process works from site analysis through post-installation care, and what a professional xeriscape investment realistically involves. If you’re researching xeriscaping in Denver, this is the straightforward guide we’d want you to have.

What Is Xeriscaping? A Denver-Specific Answer

Xeriscaping is a landscape design approach that dramatically reduces outdoor water use through intentional plant selection, efficient irrigation, and smart site planning. It doesn’t eliminate plants. It replaces thirsty, high-maintenance turf with drought-adapted species that are layered, colorful, and good for local wildlife.

Denver Water coined the term in the early 1980s in direct response to regional water shortages, combining “landscape” with the Greek word for dry. That origin matters: water-wise landscaping wasn’t invented as a trend. It was a practical response to conditions the Front Range has always faced.

The Colorado River Basin megadrought has reinforced that urgency at a policy level. Many municipalities across the Front Range now actively discourage large, high-water lawns. Some offer turf-removal rebates to accelerate the shift.

One misconception worth addressing directly: zero-scape and xeriscape aren’t the same thing. Zero-scape removes all plant material and replaces it with rock or hardscape. Xeriscape uses drought tolerant plants thoughtfully placed to create a living, breathing outdoor environment that simply needs far less water than Kentucky bluegrass. The result, when properly designed, is often more visually interesting than a traditional lawn.

Why Denver Homeowners Are Converting to Xeriscape Now

Why Denver Homeowners Are Converting to Xeriscape Now

Three pressures have pushed Denver homeowners toward water wise landscaping Denver-wide, and they’re all accelerating at once.

The first is water cost and scarcity. Denver sits at high altitude in a semi-arid climate that depends on the Colorado River Basin snowpack for its water supply. That snowpack has been unreliable, and water rates reflect that reality. Outdoor irrigation accounts for a large share of residential water use, and traditional turf lawns are among the thirstiest features a property can have.

The second is municipal policy. Across our service communities, including Denver, Cherry Hills Village, Greenwood Village, Littleton, Highlands Ranch, Parker, Castle Rock, and Boulder, local water authorities are increasingly offering financial incentives to remove high-water turf and discouraging its installation in new projects. That policy direction isn’t reversing.

The third is property value and daily livability. A well-designed xeriscape adds curb appeal without the weekly mowing, the seasonal fertilizing, and the high summer irrigation bills. It performs better in Denver’s climate than a turf lawn does during the dry months of July and August. And when designed by a firm with real Front Range experience, it looks beautiful year-round.

This isn’t a landscaping trend. It’s an adaptation to conditions Denver homeowners have always faced. The difference now is that the tools, the plant palette, and the design knowledge to execute it well are more refined than they’ve ever been.

The Real Water Savings: What the Numbers Look Like in Denver

Denver Water data makes the return on investment case clearly. Xeriscaping typically saves Denver homeowners 50 to 75 percent of their outdoor water use compared to traditional turf-heavy yards.

Converting Kentucky bluegrass saves roughly 19 to 33 gallons of water per square foot per year. That translates to approximately $0.36 per square foot annually in water bill savings. At 1,000 square feet converted, that’s roughly $360 per year, every year, compounding over the life of the landscape.

The savings scale directly with how much turf you replace. A 2,500-square-foot conversion produces savings approaching $900 annually. Over a ten-year period, the water savings alone begin to offset a meaningful portion of the original installation investment. We’ll talk about what that investment looks like later in this page.

The Seven Principles of Xeriscape Design Applied to Colorado

Denver Water’s original seven xeriscape principles are the foundation every credible xeriscape design should follow. Here’s how they apply specifically to Front Range conditions:

  • Planning and design. Site analysis comes before any plant selection. We evaluate sun exposure, drainage patterns, slope, soil type, and how you actually use the space. Our article on designing for Denver microclimates goes deeper on why this step is non-negotiable in a climate as variable as Colorado’s.
  • Soil improvement. Denver soils are frequently clay-heavy, compacted, and slow-draining. Amendments are not optional here. The right soil preparation supports root development and water infiltration, which directly affects plant survival and long-term performance.
  • Efficient irrigation. Drip irrigation and targeted low-volume systems deliver water directly to the root zone, where it belongs. Broadcast sprinklers waste water through evaporation and overspray. We design every irrigation system around hydrozones so water goes exactly where plants need it.
  • Appropriate plant selection. Denver’s USDA hardiness zones range from 5b to 7a depending on location and microclimate. Native and climate-adaptive species selected for this range establish faster, tolerate our freeze-thaw cycles, and require far less supplemental water once they’re established.
  • Practical turf areas. Turf has a place in a well-designed landscape: where it’s actively used for play, pets, or gathering. What it doesn’t need to be is default filler coverage for every open area of the yard.
  • Mulching. A proper mulch layer conserves soil moisture, moderates temperature extremes, and suppresses weeds. In a Denver xeriscape, mulching is both a water conservation tool and a plant health strategy.
  • Maintenance. Xeriscape is lower-maintenance than a traditional lawn, not zero-maintenance. Seasonal pruning, irrigation checks, and periodic re-mulching keep the landscape performing well year after year.
Colorado Xeriscape Plants Worth Knowing: A Curated Front Range List

Colorado Xeriscape Plants Worth Knowing: A Curated Front Range List

The right plant list for a Colorado xeriscape depends on your specific site. That said, these are species we know perform well across Front Range conditions, drawn from our experience designing and building in Denver and surrounding communities.

For the full picture on plant performance in Denver’s soils and climate, our guide to plant selection for Denver landscapes goes deeper on selection and establishment.

Ornamental Grasses

  • Blue Grama (Bouteloua gracilis): A Colorado native that thrives in dry, open conditions and produces distinctive eyelash-shaped seed heads that add late-season texture.
  • Feather Reed Grass (Calamagrostis x acutiflora): Upright, structural, and adaptable; provides vertical interest and winter presence in a mixed planting.
  • Buffalo Grass (Bouteloua dactyloides): An excellent low-water turf alternative for functional lawn areas, requiring significantly less irrigation than Kentucky bluegrass.

Flowering Perennials

  • Apache Plume (Fallugia paradoxa): A semi-shrubby perennial with white flowers and feathery pink seed heads; tough, drought tolerant, and striking in mass plantings.
  • Black-eyed Susan (Rudbeckia hirta): Bright, long-blooming, and familiar; one of the most reliable performers for adding color to drought tolerant planting designs.
  • Salvia (Salvia nemorosa): Reliable purple spikes from late spring through fall; pollinator-friendly and extremely low-water once established.
  • Penstemon (Penstemon strictus): Colorado’s own native beardtongue; tubular purple-blue flowers that hummingbirds find irresistible and that thrive in lean, dry soil.
  • Catmint (Nepeta x faassenii): Soft gray-green foliage with lavender flower spikes; long-blooming, drought tolerant, and a workhorse in the perennial border.

Shrubs and Groundcovers

  • Rabbitbrush (Ericameria nauseosa): A high-altitude native that explodes with bright yellow flowers in late summer when many other plants are winding down.
  • Low Grow Sumac (Rhus aromatica ‘Gro-Low’): A spreading groundcover shrub with good fall color and strong drought tolerance once established; works well on slopes and as a lawn replacement in sunny areas.
  • Yucca (Yucca glauca): A Colorado native with bold, spiky form and tall cream flower stalks in early summer; thrives in dry, lean soil and adds year-round structure to xeriscape plantings.
  • Sedum (Sedum spp.): Low-growing and nearly indestructible in Front Range conditions; provides textural contrast, late-season color, and reliable ground coverage with minimal water.

Plant selection must match your specific site conditions. Sun exposure, drainage, soil depth, and microclimate all influence which species will actually perform versus struggle.

Why Plant Selection Alone Is Not a Xeriscape Plan

We hear this regularly: a homeowner removes their lawn, puts in some native plants, and then wonders why their xeriscape plans aren’t working. The plant list isn’t the plan, it’s only one layer of the plan.

Without hydrozone planning, plants with different water needs end up in the same irrigation zone. Some get too much water, others not enough. Without drainage analysis, poorly draining areas become problem zones where even drought-tolerant species struggle during wet springs. Without a calibrated drip system, the right plant in the wrong watering regime fails anyway.

Homeowners who DIY or work with a design-only firm frequently run into this problem. They get a planting plan, but no one handles the irrigation design, the soil amendments, or the site drainage before anything goes in the ground. The result is poor establishment, plant loss, and frustration.

We handle all of that before a single plant goes in. The site analysis, hydrozone plan, irrigation design, and construction are part of one integrated process, managed by the same team from start to finish.

How We Approach Xeriscape Design and Construction in Denver

As a fully in-house operation, Phase One Landscape’s approach to Denver xeriscape planting projects follows a clear, accountable sequence. There are no handoffs to outside builders and no gaps between what was designed and what gets built.

Here’s what that looks like in practice for a typical xeriscape project:

  • Initial consultation and site analysis: We meet on-site to evaluate soil conditions, drainage patterns, sun mapping, slope, and your goals for the space. What you want to use it for matters as much as what it looks like.
  • Hydrozone planning: We group areas of the property by water need. This step is what makes the irrigation system efficient and what gives plants the right conditions to establish and thrive.
  • Design development: Our designer develops the plant palette, hardscape integration, drip irrigation layout, and mulching plan. You review it with the same person who will manage your project through construction.
  • Construction: Our in-house crew builds what our team designs with no handoffs, no interpretation gaps, and no subcontracted builders working from someone else’s drawings. Our landscape construction and landscape design processes operate as one integrated workflow.
  • Irrigation installation and calibration: An in-house irrigation specialist handles the system setup, zoning, and calibration to match the hydrozone plan. This isn’t subcontracted out.
  • Plant establishment monitoring: Our irrigation specialist checks in on the installation for three to four weeks post-installation, adjusting watering as plants establish.
  • 30-day satisfaction check-in and warranty coverage: We follow up at 30 days, and every xeriscape we build is backed by a one-year warranty on all plant material and a two-year limited warranty on hardscape work.

If you’re thinking about a xeriscape project for your Denver property, request an appointment with Phase One Landscapes to walk through your site and goals with our team. You can also reach us directly at (303) 750-6060.

What a Professional Xeriscape Investment Looks Like

Professional xeriscape design is a real financial commitment, and understanding what drives cost helps homeowners plan honestly.

Our typical first-time project sweet spot is $80,000 to $120,000 for a full site project, with a minimum project size of approximately $20,000. Estate-level work scales from $350-500K. What moves cost up or down: total square footage being converted, existing site conditions and any demolition required, plant selection and material grade, hardscape integration, irrigation system complexity, and the scope of design work involved.

We price at fair market value, tot the cheapest quote in Denver, nor the highest. Our goal is to deliver a product worth every dollar you spend, and to be transparent about what’s driving the number before construction starts.

The long-term value case is straightforward. Water savings compound annually, and maintenance demands drop compared to a traditional lawn. A professionally designed, well-executed xeriscape improves property value and holds up over time. This is a landscape built to last in Colorado’s climate, not a lawn that fights the climate every season.

Pricing, availability, square footage, floor plans, features, and home specifications are subject to change without notice. Please contact us to confirm current details before making any purchase decision.

Award-Winning Xeriscape Design Built on 35 Years of Front Range Experience

Phase One Landscapes was founded in 1994, and we’ve been designing and building landscapes across the Greater Denver Metro area and the Colorado Front Range for more than three decades. We’ve worked in the neighborhoods and soil conditions that define Denver landscape construction and design: the clay-heavy lots of Cherry Hills Village, the sloped sites in Castle Rock, and wind-exposed properties on the eastern Front Range.

We’ve submitted projects to the Associated Landscape Contractors of Colorado Excellence in Landscape Awards since 1987, earning 17 awards across that body of work, including 13 Award of Excellence or Merit awards and 4 Grand Awards. Our award-winning landscape design work reflects what’s possible when site knowledge, plant expertise, and in-house construction come together in one accountable process. We also maintain active membership in both ALCC and ASLA, and we’ve state-licensed landscape architects on staff.

For xeriscaping executed at a higher level, credentials like these matter. Any firm can put together a plant list, but far fewer can design the hydrozone plan, build the irrigation system, install the hardscape, and back the whole thing with a warranty, all from one in-house team. That’s what 35 years of Denver landscape expertise actually looks like in practice.

Frequently Asked Questions About Xeriscaping in Denver

Is xeriscaping the same as zero-scaping?

No. Zero-scape removes all plant material and typically replaces it with rock or inert hardscape. Xeriscape uses carefully selected drought-adapted plants to create a living, layered, beautiful outdoor environment that uses far less water than a traditional lawn. The two approaches produce completely different results.

How much water does xeriscaping save in Denver?

Denver Water data shows xeriscaping typically saves 50 to 75 percent of outdoor water use compared to turf-heavy yards. Replacing Kentucky bluegrass saves roughly 19 to 33 gallons per square foot per year, which works out to approximately $0.36 per square foot annually. At 1,000 square feet converted, that’s roughly $360 per year in water bill savings.

Do xeriscape plants survive Denver winters?

Yes, when properly selected. Colorado native and climate-adaptive species are well-suited for Front Range freeze-thaw cycles, high-altitude wind, and temperature extremes. The key is matching the plant to the specific site conditions, which is why site analysis and plant selection go together in our process.

How long does a xeriscape project take?

Timelines vary based on scope, but a typical design-build project from initial consultation through installation runs several months. We can give you a more specific projection once we’ve assessed your site and developed the design. For more detail on timelines and processes, our FAQ page offers answers to many frequently asked questions.

Does Phase One Landscapes offer a warranty on xeriscape plants?

Yes. We back every installed xeriscape with a one-year warranty on all plant material and a two-year limited hardscape warranty. Our irrigation specialists also monitor plant establishment for three to four weeks post-installation, and we follow up with a 30-day satisfaction check-in to make sure everything is performing as it should.

Ready to Design a Water-Wise Landscape for Your Denver Property?

A professionally designed Denver xeriscape delivers beauty, meaningful water savings, and a landscape built specifically for the local climate. It’s a long-term investment that performs better over time than the turf it replaces, and it’s backed by one in-house team from the first consultation through post-installation care.

We serve Denver, Cherry Hills Village, Greenwood Village, Littleton, Highlands Ranch, Parker, Castle Rock, Boulder, and areas in between. If you’re ready to talk through your property and goals, schedule a consultation with our team. You can also call us directly at (303) 750-6060.

Not quite ready to reach out? Explore our resource on eco-friendly Denver landscape design to learn more about water-wise design approaches, or visit our plant care and maintenance guide to understand what long-term stewardship of a xeriscape looks like.


About Phase One Landscapes 

At Phase One Landscapes, we put your goals at the center of every design. With years of hands-on experience across Colorado, a passion for creativity, and a commitment to honest, friendly service, we’d be honored to guide your landscape transformation.

Ready to bring your dream yard to life? Contact us today for a consultation—let’s start the next chapter of your outdoor story together.

We can’t wait to hear your ideas—and turn them into reality!

Picture of Written by Dave Graham

Written by Dave Graham

Dave is a Denver native and co‑founder of Phase One Landscapes. After earning a B.S. in Landscape Architecture from Iowa State University in 1981, he worked as a laborer, construction foreman, and designer, learning residential design/build from the ground up. In 1988 he partnered with Dennis Frank to launch Phase One Landscapes, which has delivered hundreds of landscapes across Greater Denver. Dave prioritizes quality and service and remains involved with clients and teams. The firm’s projects have earned ALCC awards, appeared on ASLA Garden tours, and been published in national and local magazines.
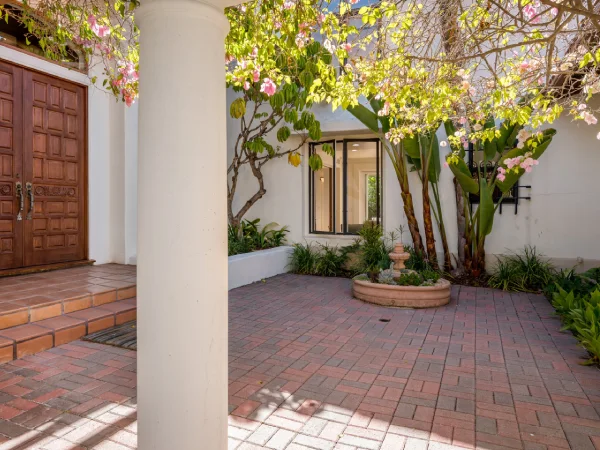
View Dave Graham Profile

June 12, 2026 by Admin 0 Comments

Beyond Basic: Designing a Custom Flagstone Entry That Actually Fits Your Denver Home

There’s a certain kind of front entry that stops you. You’re walking through a neighborhood, or scrolling through photos, and something about it just feels right. The stone looks like it belongs, the proportions make sense, and the whole thing reads as intentional rather than installed. And then there are entries that have perfectly fine flagstone and still feel generic, like a surface treatment someone chose from a catalog rather than a design someone actually thought through.

The difference isn’t usually the stone itself. It’s everything that happens before the stone gets set, and the decisions that get made, or skipped, along the way.

At Phase One Landscapes, we’ve been designing and building custom flagstone entries in Denver for over 30 years, and the projects that hold up beautifully, both visually and structurally, are the ones where the real decisions got made carefully. Stone selection, sub-base preparation, drainage, jointing, slope management, and proportioning to the home’s architecture aren’t afterthoughts in our process. They’re the work. We want to walk you through what those decisions actually involve, so that when you’re ready to have a conversation with a contractor, you know what questions to ask and what good answers sound like.


What Makes a Flagstone Entry Feel Custom (And What Makes It Feel Generic)

Custom isn’t a price point, and it isn’t even really a material. It’s the result of a comprehensive landscape design/build process that starts by looking at the home itself rather than at a catalog of stone options.

When we evaluate a front entry project, we’re looking at the home’s architecture before we’re looking at anything else. The roofline, the facade materials, the scale of the front door, the width of the approach from the street. A flagstone entry proportioned well to a craftsman bungalow looks completely different from one that suits a contemporary home with clean horizontal lines. Same material, entirely different design logic, and that distinction matters more than most homeowners realize when they’re still in the inspiration phase.

A few things consistently separate entries that feel genuinely custom from those that feel dropped in:

  • Stone size relative to the scale of the space. Smaller irregular pieces on a wide, sweeping approach look busy and unresolved, while larger format stone on a narrow entry can feel heavy and out of place. Getting this right requires seeing the space in person, not just measuring it on paper.
  • Layout pattern in relation to the home’s architectural lines. A random flagstone pattern can feel organic and grounded, or it can feel chaotic, and the difference comes down to how it’s controlled at the edges, transitions, and termination points.
  • How the entry connects to the rest of the front yard. A beautiful flagstone walk that abruptly meets a concrete curb or a disconnected planting bed hasn’t been fully designed. The arrival sequence, from the street to the door, matters as a whole.
  • Material finish and color in relation to the home’s exterior palette. Stone that fights the facade rather than complementing it will always feel like an afterthought, regardless of how well it’s installed.

The entry is the first thing people experience when they approach your home, and it should feel like it was designed for that specific house because it should be.


Choosing the Right Stone for Denver’s Climate

Denver’s climate is harder on stone than most homeowners realize, and understanding why matters before any material decision gets made. We’re at altitude, which means more UV exposure than lower-elevation cities. We also have significant temperature swings between day and night, sometimes 40 degrees or more within a single day, and we get freeze-thaw cycles that put real stress on porous materials over the course of a season. An essential strategy for climate-adapted Denver landscaping is critical.

When water gets into a porous stone and freezes, it expands, and doing that repeatedly over a few winters produces spalling, cracking, and surface degradation that compounds over time. The stone doesn’t fail all at once. It just gradually looks worse every year until it’s a maintenance problem rather than a design asset.

For flagstone entries, we tend to favor locally sourced stone that’s proven itself in this climate. Colorado sandstones like red flagstone and Colorado buff are common choices in our work, and they meet the performance criteria that matter most here:

  • Low absorption rate, so freeze-thaw cycling doesn’t work its way into the material and cause damage from within.
  • Consistent density and tight grain structure, which points toward harder options like quartzite or certain Colorado sandstones rather than softer choices like limestone.
  • A finish that performs outdoors. A highly polished surface can become slippery when wet and tends to show UV wear faster at altitude, while a natural cleft or brushed finish gives better traction and holds its appearance longer.
  • Appropriate thickness and uniformity, so the stone can be set level and doesn’t create tripping hazards as the installation ages.

Limestone can be beautiful, and slate has visual appeal, but both require careful evaluation for this specific climate and application. There’s no single right answer, but there are wrong answers, and they’re usually driven by choosing stone for how it looks in a showroom rather than how it performs on a Denver property through four seasons.


The Foundation Nobody Sees (And Why It’s the Most Important Part)

If there’s one place where flagstone installations fail in Denver, it’s not the stone and it’s not the design. It’s the base. A properly prepared sub-base is the part of the project that’s invisible once the work is done, which is exactly why it’s where corners get cut when someone is working to a low bid.

A properly prepared sub-base for a local flagstone entry here typically involves:

  1. Excavation to the appropriate depth, accounting for base material, the setting bed, and the stone itself, with that depth informed by the site’s drainage conditions and freeze exposure.
  2. Compacted gravel base material that provides stable, well-draining support and resists shifting through freeze-thaw cycles rather than moving with them.
  3. A setting bed, either sand or a dry-pack mortar mix depending on the jointing approach, that allows each stone to be leveled accurately and seated firmly without voids underneath.
  4. Drainage consideration built into every layer, so water moves through and away from the base rather than pooling beneath the surface and working against the installation over time.

We’ve seen beautiful stone set over an inadequate base start to shift, heave, and separate within a season or two, and the stone always gets blamed even though the base is the actual problem. The frustrating part is that there’s no way to correct it without pulling everything up and starting over, which ends up costing considerably more than doing it right the first time. The cost difference between a properly built entry and a shortcut entry often isn’t visible on day one. It shows up in year two or three, when the repairs start.


Mortared vs. Dry-Set: Understanding Your Jointing Options

Once the base is right, the jointing decision shapes both the appearance and the long-term behavior of the installation, and the two primary approaches aren’t interchangeable or simply a matter of preference.

Mortared jointing fills the gaps between stones with a cement-based mortar mix, producing a cleaner and more formal look that eliminates weeds growing in the joints. The trade-off is that mortar is rigid, and in Denver’s climate, where the ground moves with temperature changes and freeze-thaw cycles, rigid joints can crack over time. Mortar repairs are also more involved because you can’t simply pull a stone and reset it without disturbing the surrounding joints.

Dry-set or sand-set jointing uses compacted sand or decomposed granite between the stones, which is more flexible and accommodates ground movement without cracking. It’s also considerably easier to repair if a stone ever needs to be reset or replaced. The trade-off is that joints require occasional maintenance to stay full and weed-free, and the overall aesthetic is more casual and organic than what mortared work delivers.

Neither approach is universally right, and the choice depends on the design aesthetic, the specific site conditions, and the homeowner’s honest tolerance for ongoing maintenance versus the constraints of a more rigid installation. We talk through that trade-off with every client during the design phase, because the right answer is always specific to the project and the person.


Slope, Drainage, and Protecting What’s Behind the Stone

Water is going to move across your flagstone entry, and the only real question is where it goes when it does. A flagstone surface without adequate slope will let water pool, and pooled water on a Denver entry means freeze-thaw stress on the stone surface, potential ice hazards through winter, and over time, water finding its way into the sub-base or toward the home’s foundation.

The general standard for paved surfaces requires a minimum cross-slope that moves water consistently away from the structure, but slope doesn’t exist in isolation. It has to be coordinated with step placement, the grade of the surrounding yard, and where the water ultimately drains. An entry that pitches water off the walk and directly into a planting bed sitting against the foundation hasn’t solved the drainage problem. It just moved it a few feet closer to the house.

We design slope and drainage into an entry from the first sketch, not as a correction at the end of the process. It informs where steps land, how the walk transitions to the yard, and whether a dedicated drainage solution is needed at the base of the entry or along the perimeter. By the time we’re setting stone, every water path has been planned and accounted for.


What the Design-Build Process Looks Like for a Custom Entry

For homeowners who haven’t worked with a design-build firm before, the process feels a little different from hiring a contractor to execute a plan someone else drew, and that difference is worth understanding before you start making calls.

It starts with a site visit and a real conversation. We’re looking at the home, the existing grade, the approach from the street, and whatever you’ve been thinking about in terms of goals and preferences. We’re also listening for what’s actually driving the project, whether that’s curb appeal, safety, resale value, or simply wanting something that finally feels right when you pull into the driveway.

From there, the design develops through a collaborative process. We’re working through stone selection, layout, jointing, drainage, and how the entry connects to the broader front yard composition. You’re seeing the plan before anything is built, and revisions happen at the drawing stage where they’re straightforward, rather than on-site where they’re costly and complicated.

What’s genuinely different about our model is that the designer who draws the plan stays with the project through the landscape construction process rather than handing off a set of drawings and stepping away. When decisions come up on-site, and they always do, that designer is available to make a call that’s consistent with the original design intent. That continuity protects the outcome in ways that are hard to quantify but easy to feel in the finished result. If you’d like to see examples of finished entries and front yard projects, our Entry and Curb Appeal portfolio page shows a range of what’s possible across different home styles and project scopes.


Ready to Think Through Your Entry?

A flagstone entry done right is a design decision from the ground up, and every layer of that process, from stone selection to sub-base preparation to drainage planning, determines whether the finished result holds up as well as it looks. It’s not just about finding a stone you like. It’s about proportioning it to your home, building the foundation correctly, managing water from the first sketch, and working with a team that stays involved from the design conversation through the final stone being set.

If you’re thinking about a front entry upgrade, we’d be glad to take a look at your space and talk through what’s possible; Contact us today to request an appointment. There’s no pressure in that conversation, just a chance to get a clearer picture of what a custom entry could look like for your specific home.


Frequently Asked Questions

How long does a flagstone entry last in Denver?

A properly designed and installed flagstone entry, with the right stone, a solid base, and adequate drainage, can last several decades with minimal intervention. The installations that fail early almost always trace back to a base or drainage problem rather than a stone problem, which is why the work that happens below the surface matters as much as what’s visible above it.

How much does a custom flagstone entry cost in Denver?

Flagstone entry projects vary widely depending on size, stone selection, site conditions, and the complexity of any drainage or grading work involved. At Phase One Landscapes, our pricing reflects quality materials, proper preparation, and professional installation from a team that’s been doing this work in Denver for over 30 years. We don’t position as the lowest-cost option in the market, and we’re transparent about that. What we offer is fair market value pricing for work that’s built to last and backed by our warranties.

Do I need a permit for a flagstone walkway in Denver?

It depends on the scope of the project. Straightforward flagstone walkways often don’t require permits, but projects involving significant grading, drainage infrastructure, or structural elements like retaining walls typically do. We handle permitting as part of our process, so our clients don’t have to navigate the city’s requirements on their own.

What’s the difference between flagstone and pavers for a front entry?

Pavers are manufactured to consistent dimensions, which makes installation more predictable and individual repairs more straightforward over time. Flagstone is a natural material, meaning each piece is unique in shape, thickness, and character, and that’s precisely what gives it the organic, custom quality that pavers can’t replicate. Flagstone tends to feel more grounded and site-specific in appearance, while pavers offer more uniformity and can be easier to maintain. Both perform well in Denver’s climate when they’re installed correctly, and the choice usually comes down to the architectural character of the home and the aesthetic the homeowner is working toward.


About Phase One Landscapes 

At Phase One Landscapes, we put your goals at the center of every design. With years of hands-on experience across Colorado, a passion for creativity, and a commitment to honest, friendly service, we’d be honored to guide your landscape transformation.

Ready to bring your dream yard to life? Contact us today for a consultation—let’s start the next chapter of your outdoor story together.

We can’t wait to hear your ideas—and turn them into reality!

Picture of Written by Dave Graham

Written by Dave Graham

Dave is a Denver native and co‑founder of Phase One Landscapes. After earning a B.S. in Landscape Architecture from Iowa State University in 1981, he worked as a laborer, construction foreman, and designer, learning residential design/build from the ground up. In 1988 he partnered with Dennis Frank to launch Phase One Landscapes, which has delivered hundreds of landscapes across Greater Denver. Dave prioritizes quality and service and remains involved with clients and teams. The firm’s projects have earned ALCC awards, appeared on ASLA Garden tours, and been published in national and local magazines.
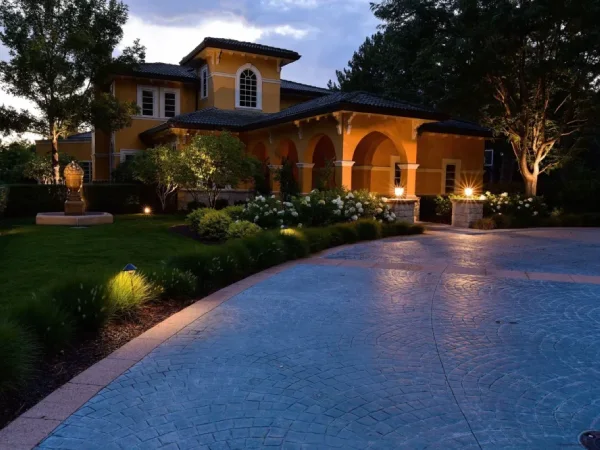
View Dave Graham Profile

May 28, 2026 by Admin 0 Comments

A Residential Landscape Evolves Over Time

This outdoor renovation better accommodates the homeowners’ current phase of life.

April 20, 2026 by Anne Hebert

A Residential Landscape Evolves Over Time

A family home in Denver’s Hilltop neighborhood has seen many changes over the 30 years that the occupants have built their lives there. Once centered around family and recreation, the outdoor space is now a welcoming, sustainable environment for entertaining and hosting.

Phase One Landscapes originally helped the family turn their outdoor space into a kid-friendly, traditional yard with a pool in the back and a lush lawn in the front,” says Brendan Heiman, senior landscape architect and project manager. “Once the clients’ children grew up and moved out of the family abode, their needs shifted.

Eco-friendly landscapes

Photo: James Messer

With an emphasis on welcoming and entertaining visiting family and guests, the homeowners returned to Phase One Landscapes to create an eco-friendly, water-wise space in the front and back of their home. Low maintenance is a special perk that offers a chance to enjoy the yard without as much associated work.

The front lawn was reimagined with perennial plants that flourish in Colorado’s arid climate,” Heiman says. “Year-round blooming plants mixed with evergreens and native grasses offer an attractive look through each season.” Low red stripstone seating walls offer texture, height and visual interest by bringing depth to what used to be a flat, unused space.

Low red stripstone seating walls

Photo: James Messer

The front courtyard now contains a vibrant pollinator garden, and the pathways through the property, including a route for the mailman, are defined with flagstone steppers, cedar mulch, and dark gray monzonite gravel sourced from the Idaho Springs area.

The backyard green space was made smaller and covered in synthetic turf. Bright blue pots give a pop of color during the winter months, and are filled with multi-hued, seasonal annuals each spring. A covered patio contains an outdoor kitchen, bar, and al fresco dining area with enough space to comfortably seat and serve up to 30 guests.

appealing views from front to back

Photo: James Messer

With appealing views from front to back, this redesign reflects what we call a good neighborhood garden,” says Heiman. “With no irrigated grass, especially important water-wise care is easily achieved. Evolving gracefully over time, the residence’s exterior better reflects the owner’s lifestyle. Heiman notes, “The carefully curated design is a prime example of how outdoor living changes over the years.

carefully curated design

Photo: James Messer

Design Details

Landscaping: Phase One Landscapes
Architecture: Brendan Heiman


About Phase One Landscapes 

At Phase One Landscapes, we put your goals at the center of every design. With years of hands-on experience across Colorado, a passion for creativity, and a commitment to honest, friendly service, we’d be honored to guide your landscape transformation.

Ready to bring your dream yard to life? Contact us today for a consultation—let’s start the next chapter of your outdoor story together.

We can’t wait to hear your ideas—and turn them into reality!

Picture of Written by Dave Graham

Written by Dave Graham

Dave is a Denver native and co‑founder of Phase One Landscapes. After earning a B.S. in Landscape Architecture from Iowa State University in 1981, he worked as a laborer, construction foreman, and designer, learning residential design/build from the ground up. In 1988 he partnered with Dennis Frank to launch Phase One Landscapes, which has delivered hundreds of landscapes across Greater Denver. Dave prioritizes quality and service and remains involved with clients and teams. The firm’s projects have earned ALCC awards, appeared on ASLA Garden tours, and been published in national and local magazines.
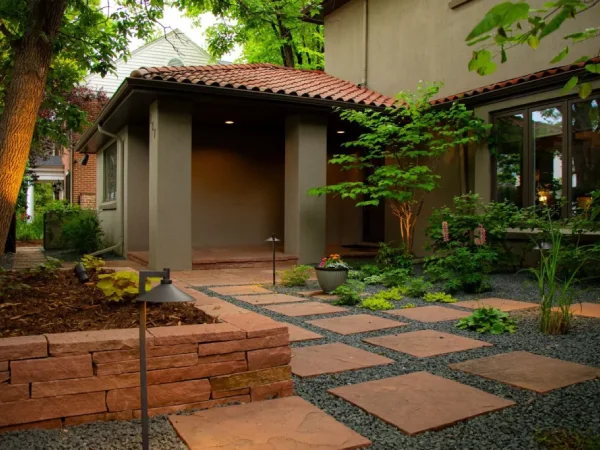
View Dave Graham Profile